You cannot select more than 25 topics
Topics must start with a letter or number, can include dashes ('-') and can be up to 35 characters long.
2.1 KiB
2.1 KiB
Operating System development tutorials in Rust on the Raspberry Pi
Notice
This is a work-in-progress rewrite, started on September 2019. I will first add code and minimal READMEs, and later write accompanying full-fledged tutorial text.
- The code written in these tutorials supports and runs on the Raspberry Pi 3 and the Raspberry Pi 4.
- Tutorials 1 till 5 are groundwork code which only makes sense to run on QEMU.
- Starting with tutorial 6, you can load and run the kernel on Raspberrys and observe output over UART.
- For practical purposes, the kernel will be a classic monolith.
- For editing, I recommend Visual Studio Code with the Rust Language Server extension.
- Check out the
make doccommand to browse the code with HTML goodness. - Note that the branch is subject to frequent force pushing. If updates happened since you last visited, make sure to clone a clean copy to be safe.
Cheers, Andre
Prerequisites
Before you can start, you'll need a suitable Rust toolchain.
curl https://sh.rustup.rs -sSf  \
    |                           \
    sh -s --                    \
    --default-toolchain nightly \
    --component rust-src llvm-tools-preview clippy rustfmt rls rust-analysis

cargo install cargo-xbuild cargo-binutils
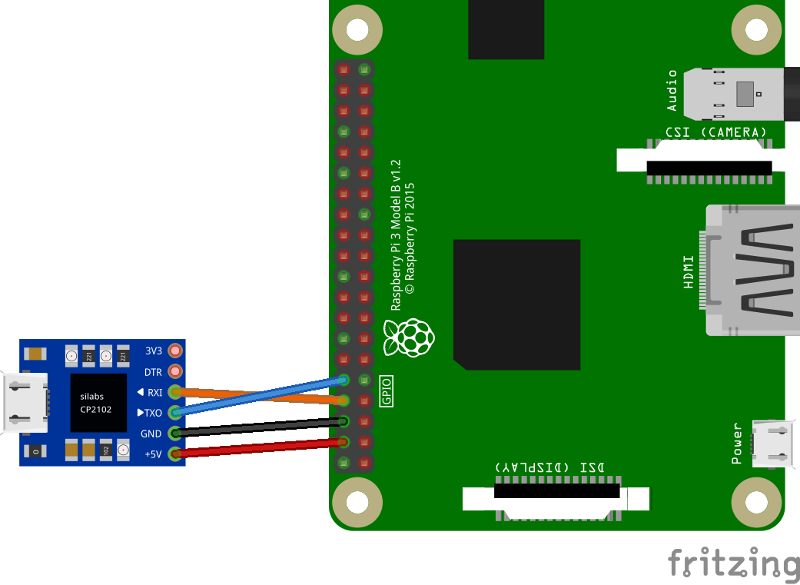
USB Serial
It is highly recommended to get a USB serial debug cable. It also powers the Raspberry once you connect it, so you don't need extra power over the dedicated power-USB. I use a bunch of these.
You connect it to the GPIO pins 14/15 as shown beyond.
Tutorial 6 is the first where you can use it. Go to the README there for instructions on how to prepare the SD card to run your self-made kernels from it.
License
Licensed under the MIT license (LICENSE-MIT or http://opensource.org/licenses/MIT).