11 KiB
The Pipeline
What's a pipeline?
If you're familiar with OpenGL, you may remember using shader programs. You can think of a pipeline as a more robust version of that. A pipeline describes all the actions the gpu will preform when acting on a set of data. In this section, we will be creating a RenderPipeline specifically.
Wait shaders?
Shader's are mini programs that you send to the gpu to perform operations on your data. There are 3 main types of shader: vertex, fragment, and compute. There are others such as geometry shaders, but they're more of an advanced topic. For now we're just going to use vertex, and fragment shaders.
Vertex, fragment.. what are those?
A vertex is a point in 3d space (can also be 2d). These vertices are then bundle in groups of 2s to form lines and/or 3s to form triangles.

Most modern rendering uses triangles to make simple shapes such as a cube, and complex shapes such as person.
We use a vertex shader to manipulate a list of vertices, in order to transform the shape to look they way we want it.
You can think of a fragment as the beginnings of a pixel in the resulting image. Each fragment has a color that will be copied to it's corresponding pixel. The fragment shader decides what color the fragment will be.
GLSL and SPIR-V
Shader's in wgpu are written with a binary language called SPIR-V. SPIR-V is designed for computers to read not people, so we're going to use a language called GLSL to write our code, and then convert that to SPIR-V.
In order to do that, we're going to need something to do the conversion. Add the following crate to you're dependencies.
[dependencies]
# ...
glsl-to-spirv = "0.1"
We'll use this in a bit, but first let's create the shaders.
Writing the shaders
In the same folder as main.rs, create two (2) files: shader.vert, and shader.frag. Write the following code in shader.vert.
// shader.vert
#version 450

const vec2 positions[3] = vec2[3](
    vec2(0.0, -0.5),
    vec2(-0.5, 0.5),
    vec2(0.5, 0.5)
);

void main() {
    gl_Position = vec4(positions[gl_VertexIndex], 0.0, 1.0);
}
If you've used C/C++ before (or even Java), this syntax should be somewhat familiar. There are some key differences though that i'll go over.
First up there's the #version 450 line. This specifies the version of GLSL that we're using. I've gone with a later version so we can use many of the advanced GLSL features.
We're currently storing vertex data in the shader as positions. This is bad practice as it limits what we can draw with this shader, and it can make the shader super big if we want to use a complex model. Using actual vertex data requires us to use Buffers, which we'll talk about next time, so we'll turn a blind eye for now.
There's also gl_Position and gl_VertexIndex which are built in variables that define where the vertex position data is going to be saved stored as 4 floats, and the index of the current vertex in the vertex data.
Next up shader.frag.
// shader.frag
#version 450

layout(location=0) out vec4 f_color;

void main() {
    f_color = vec4(0.3, 0.2, 0.1, 1.0);
}
The part that sticks out is the layout(location=0) out vec4 f_color; line. In GLSL you can create in and out variables in your shaders. An in variable will expect data from outside the shader. In the case of the vertex shader, this will come from vertex data. In a fragment shader, an in variable will pull from out variables in the vertex shader. When an out variable is defined in the fragment shader, it means that the value is meant to be written to a buffer to be used outside the shader program.
in and out variables can also specify a layout. In shader.frag we specify that the out vec4 f_color should be layout(location=0); this means that the value of f_color will be saved to whatever buffer is at location zero in our application. In most cases, location=0 is the current texture from the swapchain aka. the screen.
You may have noticed that shader.vert doesn't have any in variables nor out variables. gl_Position functions as an out variable for vertex position data, so shader.vert doesn't need any out variables. If we wanted to send more data to fragment shader, we could specify an out variable in shader.vert and an in variable in shader.frag. Note: the location has to match, otherwise the GLSL code will fail to compile
// shader.vert
layout(location=0) out vec4 v_color;

// shader.frag
layout(location=0) in vec4 v_color;
How do we use the shaders?
This is the part where we finally make the thing in the title: the pipeline. First let's modify State to include the following.
// main.rs
struct State {
    surface: wgpu::Surface,
    device: wgpu::Device,
    queue: wgpu::Queue,
    sc_desc: wgpu::SwapChainDescriptor,
    swap_chain: wgpu::SwapChain,

    // NEW!
    render_pipeline: wgpu::RenderPipeline,

    hidpi_factor: f64,
    size: winit::dpi::LogicalSize,
}
Now let's move to the new() method, and start making the pipeline. We'll have to load in those shaders we made earlier, as the render_pipeline requires those.
let vs_src = include_str!("shader.vert");
let fs_src = include_str!("shader.frag");

let vs_spirv = glsl_to_spirv::compile(vs_src, glsl_to_spirv::ShaderType::Vertex).unwrap();
let fs_spirv = glsl_to_spirv::compile(fs_src, glsl_to_spirv::ShaderType::Fragment).unwrap();

let vs_data = wgpu::read_spirv(vs_spirv).unwrap();
let fs_data = wgpu::read_spirv(fs_spirv).unwrap();

let vs_module = device.create_shader_module(&vs_data);
let fs_module = device.create_shader_module(&fs_data);
One more thing, we need to create a PipelineLayout. We'll get more into this after we cover Buffers.
let render_pipeline_layout = device.create_pipeline_layout(&wgpu::PipelineLayoutDescriptor {
    bind_group_layouts: &[],
});
Finally we have all we need to create the render_pipeline.
let render_pipeline = device.create_render_pipeline(&wgpu::RenderPipelineDescriptor {
    layout: &render_pipeline_layout,
    vertex_stage: wgpu::ProgrammableStageDescriptor {
        module: &vs_module,
        entry_point: "main", // 1.
    },
    fragment_stage: Some(wgpu::ProgrammableStageDescriptor { // 2.
        module: &fs_module,
        entry_point: "main",
    }),
Two things to note here:
- You can specify an
entry_pointfor your shaders. I normally use"main"as that's what it would be in OpenGL, but feel free to use whatever name you like. - The
fragment_stageis technically optional, so you have to wrap it inSome(). I've never not used a fragment shader with a vertex shader, but the option is available if you need it.
    // continued ...
    rasterization_state: Some(wgpu::RasterizationStateDescriptor {
        front_face: wgpu::FrontFace::Ccw,
        cull_mode: wgpu::CullMode::Back,
        depth_bias: 0,
        depth_bias_slope_scale: 0.0,
        depth_bias_clamp: 0.0,
    }),
rasterization_state describes how to process primitives (in our case triangles) before they are sent to the fragment shader (or the next stage in the pipeline if there is none). Primitives that don't meet the criteria are culled (aka. not rendered). Culling helps speed up the rendering process by not rendering things that should be visible anyway.
We'll cover culling a bit more when we cover Buffers.
    // continued ...
    color_states: &[
        wgpu::ColorStateDescriptor {
            format: sc_desc.format,
            color_blend: wgpu::BlendDescriptor::REPLACE,
            alpha_blend: wgpu::BlendDescriptor::REPLACE,
            write_mask: wgpu::ColorWrite::ALL,
        },
    ],
A color_state describes how colors are stored and processed throughout the pipeline. You can have multiple color states, but we only need one as we're just drawing to the screen. We use the swap_chain's format so that copying to it is easy, and we specify that the blending should just replace old pixel data with new data. We also tell wgpu to write to all colors: red, blue, green, and alpha. We'll talk more aboutcolor_state when we talk about textures.
    // continued ...
    primitive_topology: wgpu::PrimitiveTopology::TriangleList, // 1.
    depth_stencil_state: None, // 2.
    index_format: wgpu::IndexFormat::Uint16, // 3.
    vertex_buffers: &[], // 4.
    sample_count: 1, // 5.
    sample_mask: !0, // 6.
    alpha_to_coverage_enabled: false, // 7.
});
The rest of the method is pretty simple:
- We tell
wgputhat we want to use a list of triangles for drawing. - We're not using a depth/stencil buffer currently, so we leave
depth_stencil_stateasNone. This will change later. - We specify the type of index we want to use. In this case a 16-bit unsigned integer. We'll talk about indices when we talk about
Buffers vertex_buffersis a pretty big topic, and as you might have guessed, we'll talk about it when we talk about buffers.- This determines how many samples this pipeline will use. Multisampling is a complex topic, so we won't get into it here.
sample_maskspecifies which samples should be active. In this case we are using all of them.alpha_to_coverage_enabledhas to do with anti-aliasing. We're not covering anti-aliasing here, so we'll leave this as false now.
Now all we have to do is save the render_pipeline to State and then we can use it!
// new()
Self {
    surface,
    device,
    queue,
    sc_desc,
    swap_chain,
    // NEW!
    render_pipeline,
    hidpi_factor,
    size,
}
Using a pipeline
If you run you're program now, it'll take a little longer to start, but it will still show the blue screen we got in the last section. That's because while we created the render_pipeline. We need to modify the code in render() to actually use it.
// render()

// ...
{
    // 1.
    let mut render_pass = encoder.begin_render_pass(&wgpu::RenderPassDescriptor {
        color_attachments: &[
            wgpu::RenderPassColorAttachmentDescriptor {
                attachment: &frame.view,
                resolve_target: None,
                load_op: wgpu::LoadOp::Clear,
                store_op: wgpu::StoreOp::Store,
                clear_color: wgpu::Color {
                    r: 0.1,
                    g: 0.2,
                    b: 0.3,
                    a: 1.0,
                },
            }
        ],
        depth_stencil_attachment: None,
    });

    // NEW!
    render_pass.set_pipeline(&self.render_pipeline); // 2.
    render_pass.draw(0..3, 0..1); // 3.
}
// ...
We didn't change much, but let's talk about what we did change.
- We renamed
_render_passtorender_passand made it mutable. - We set the pipeline on the
render_passusing the one we just created. - We tell
wgputo draw something with 3 vertices, and 1 instance. This is wheregl_VertexIndexcomes from.
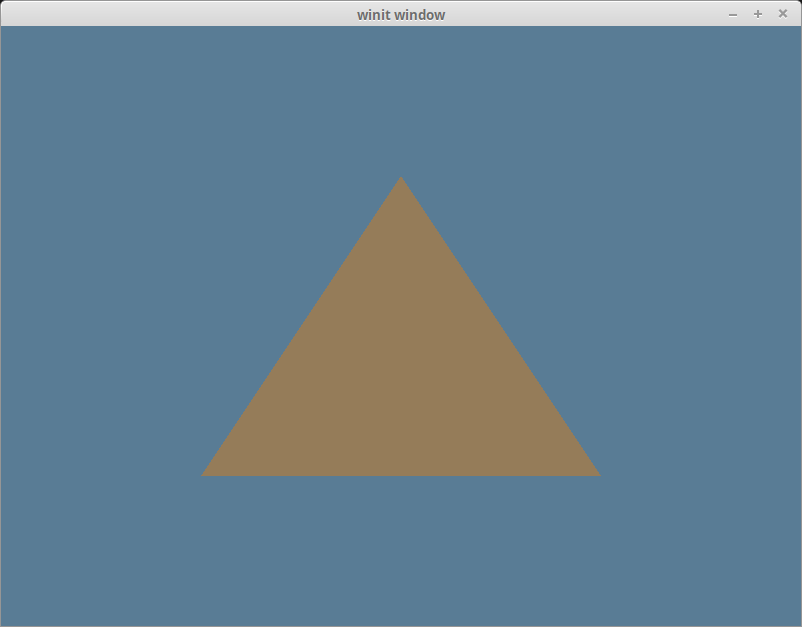
With all that you should be seeing a lovely brown triangle.
Challenge
Create a second pipeline that uses the triangles position data to create a color that it then sends to the fragment shader to use for f_color. Have the app swap between these when you press the spacebar. Hint: useinandoutvariables in a separate shader.