3.7 KiB
RTL Core lightning setup
- Introduction
- Pre-requisite
- Architecture
- Installation
- Prep for execution
- Start the server and access the app
Introduction
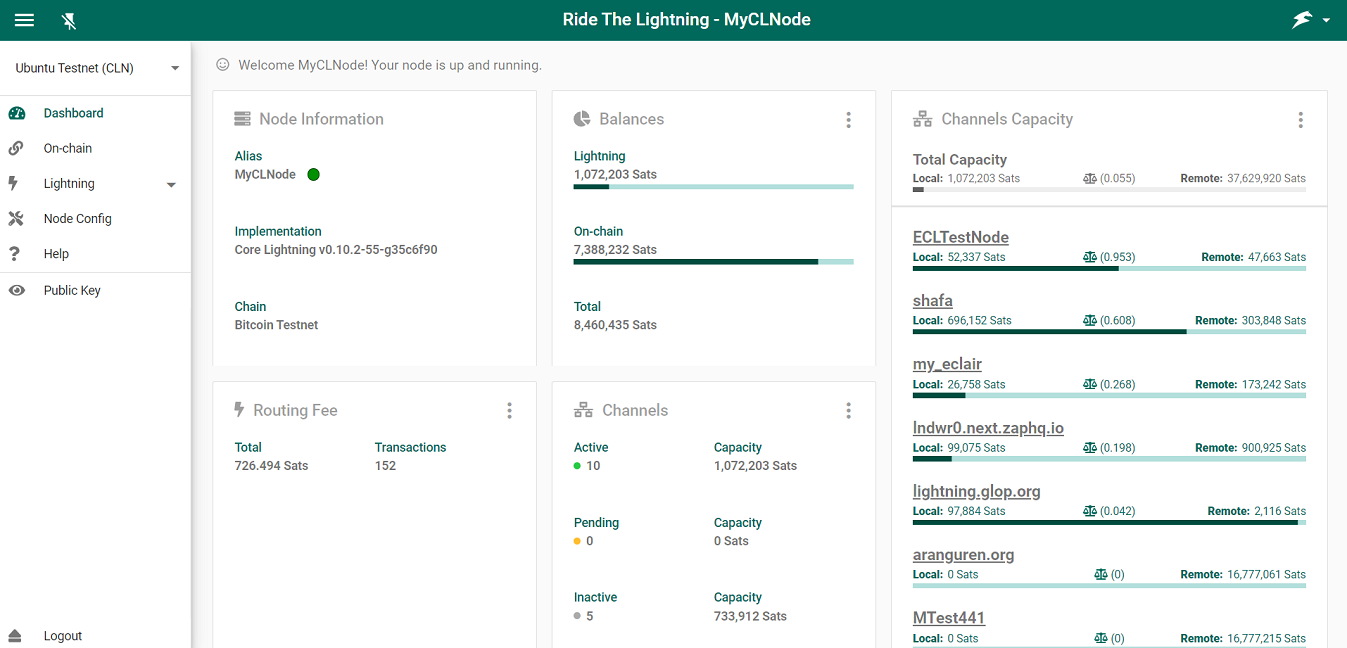
RTL is now enabled to manage lightning nodes running Core Lightning.
Follow the below steps to install and setup RTL to run on Core Lightning.
Pre-requisites:
- Functioning Core Lightning node. Follow install instructions on their github
- NodeJS - Can be downloaded here
- Cl-REST - Ensure that
cl-restAPI server is installed and running. Install instructions here - Copy the
access.macaroonfile fromcl-restto the device, on which RTL will be installed
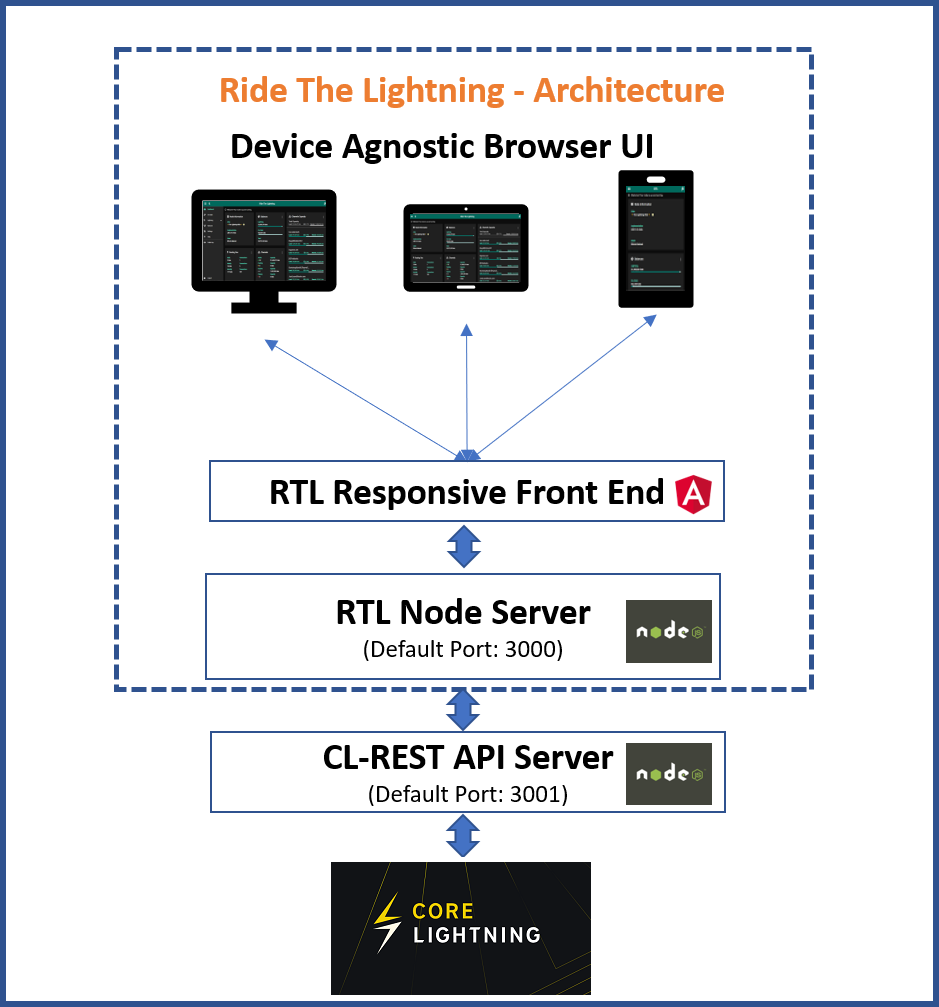
Architecture
Installation:
To download a specific RTL version follow the instructions on the release page
To download from master (not recommended):
First time setup
$ git clone https://github.com/Ride-The-Lightning/RTL.git
$ cd RTL
$ npm install --omit=dev
Or: Update existing build
$ cd RTL
$ git reset --hard HEAD
$ git clean -f -d
$ git pull
$ npm install --omit=dev
Prep for Execution
RTL requires its own config file RTL-Config.json, to start the server and provide user authentication on the app.
- Rename the file
Sample-RTL-Config.jsontoRTL-Config.jsonlocated at./RTL.. - Locate the complete path of the readable
access.macaroonfromcl-reston your node. - Modify the RTL conf file per the example file below
Ensure that the follow values are correct per your config:
lnImplementation- This should beCLN, indicating that RTL is connecting to a core lightning node.macaroonPath- Path of the folder containingaccess.macaroonfile from cl-rest server.lnServerUrl- complete url with ip address and port of the cl-rest server.multiPass- Specify the password (in plain text) to access RTL. This password will be hashed and not stored as plain text.configPath(optional) - File path of the core lightning config file, if RTL server is local to the core lightning server.
{
  "multiPass": <password required for accessing RTL>,
  "port": "3000",
  "defaultNodeIndex": 1,
  "SSO": {
    "rtlSSO": 0,
    "rtlCookiePath": "",
    "logoutRedirectLink": ""
  },
  "nodes": [
    {
      "index": 1,
      "lnNode": "Core Lightning Testnet # 1",
      "lnImplementation": "CLN",
      "Authentication": {
        "macaroonPath": "<Modify to include the path of the folder with access.macaroon>",
        "configPath": "<Optional - Config file path for core lightning>"
      },
      "Settings": {
        "userPersona": "OPERATOR",
        "themeMode": "DAY",
        "themeColor": "PURPLE",
        "bitcoindConfigPath": "",
        "logLevel": "INFO",
        "fiatConversion": false,
        "unannouncedChannels": false,
        "lnServerUrl": "https://<cl-rest api server ip address>:3001"
      }
    }
  ]
}
Start the server and access the app
Run the following command:
$ node rtl
If the server started successfully, you should get the below output on the console:
$ Server is up and running, please open the UI at http://localhost:3000 or your proxy configured url.
Open your browser at the following address: http://localhost:3000 to access the RTL app.
Detailed config and instructions
For detailed config and access options and other information, view the main readme page.