12 KiB
Ch 20. Views, Sessions, And Viminfo
After you worked on a project for a while, you may find that the project to gradually take shape with its own settings, folds, buffers, layouts, etc. It's like decorating your apartment to make it feel like home.
The problem is, when you close Vim, you lose those changes. Wouldn't it be nice if you can keep those changes so the next time you open Vim, it looks just like you had never left?
Vim has three tools for this: View, Session, and Viminfo. In this chapter, you will learn how to leverage all three to take a "snapshot" of your project.
Views
A View is the smallest subset of the three (View, Session, Viminfo). A Vim View is a collection of settings for one window. If you spend a long time working on a window and you want to preserve the mappings and folds, you can use a View.
Let's create a file called foo.txt:
foo1
foo2
foo3
foo4
foo5
foo6
foo7
foo8
foo9
foo10
In this file, create three changes:
- On line 1, create a manual fold
zf4j(fold the next 4 lines). - Change the
numbersetting:setlocal nonumber norelativenumber. - Create a local mapping to go down two lines each time you press
jinstead of one::nnoremap <buffer> j jj.
Your file should look like this:
+-- 5 lines: foo1 -----
foo6
foo7
foo8
foo9
foo10
Now, your display won't have any numbers on the left side and pressing the j key goes down two lines instead of one line.
Configuring View Attributes
Run:
:set viewoptions?
By default it should say:
viewoptions=folds,cursor,curdir
Yours might look different. Let's configure viewoptions. The three attributes you want to preserve are the folds, the mapping, and the local set option. If your setting looks like mine, you already have the folds option. You need to tell View to remember the localoptions. Run:
:set viewoptions+=localoptions
To learn what other options are available for viewoptions, check out :h viewoptions. Now if you run :set viewoptions?, you should see:
viewoptions=folds,cursor,curdir,localoptions
Saving The View
With the foo.txt window properly folded and having nonumber norelativenumber options, let's save the View. Run:
:mkview
Vim creates a View file.
View Files
You might wonder, "Where did Vim save this View file?" To see where Vim saves it, run:
:set viewdir?
The default should say ~/.vim/view (if you have a different OS, it might show a different path. Check out :h viewdir for more). If you want to change it to a different path, add this into your vimrc:
set viewdir=$HOME/else/where
Loading The View File
Close the foo.txt if you haven't, then open foo.txt again. You should see the original text without the changes. That's expected. Let's load the View file. Run:
:loadview
Now you should see:
+-- 5 lines: foo1 -----
foo6
foo7
foo8
foo9
foo10
The folds, local settings, and local mappings are restored. If you notice, your cursor should also be on the line where you left it when you ran :mkview. As long as you have the cursor option, View also remembers your cursor position.
Multiple Views
Vim lets you save 9 numbered Views (1-9).
Suppose you want to make an additional fold (say you want to fold the last two lines) with :9,10 fold. Let's save this as View 1. Run:
:mkview 1
If you want to make one more fold with :6,7 fold and save it as a different View, run:
:mkview 2
Close the file. When you open foo.txt and you want to load View 1, run:
:loadview 1
To load View 2, run:
:loadview 2
To load the original View, run:
:loadview
Automating View Creation
One of the worst things that can happen is, after spending countless hours organizing a large file with folds, you accidentally close the window and lose all fold information. To prevent this, you might want to automatically create a View each time you close a buffer. Add this in your vimrc:
au BufWinLeave *.txt mkview
Additionally, it might be nice to load View when you open a buffer:
au BufWinEnter *.txt silent loadview
Now you don't have to worry about creating and loading View anymore when you are working with txt files. Keep in mind that over time, your ~/.vim/view might start to accumulate View files. It's good to clean it up once every few months.
Sessions
If a View saves the settings of a window, a Session saves the information of all windows (including the layout).
Creating A New Session
Suppose you are working with these 3 files in a foobarbaz project:
foo.txt:
foo1
foo2
foo3
foo4
foo5
foo6
foo7
foo8
foo9
foo10
bar.txt:
bar1
bar2
bar3
bar4
bar5
bar6
bar7
bar8
bar9
bar10
and baz.txt:
baz1
baz2
baz3
baz4
baz5
baz6
baz7
baz8
baz9
baz10
And you've been working on these 3 files for a while, so that your windows layout look like (using strategically placed split and vsplit):
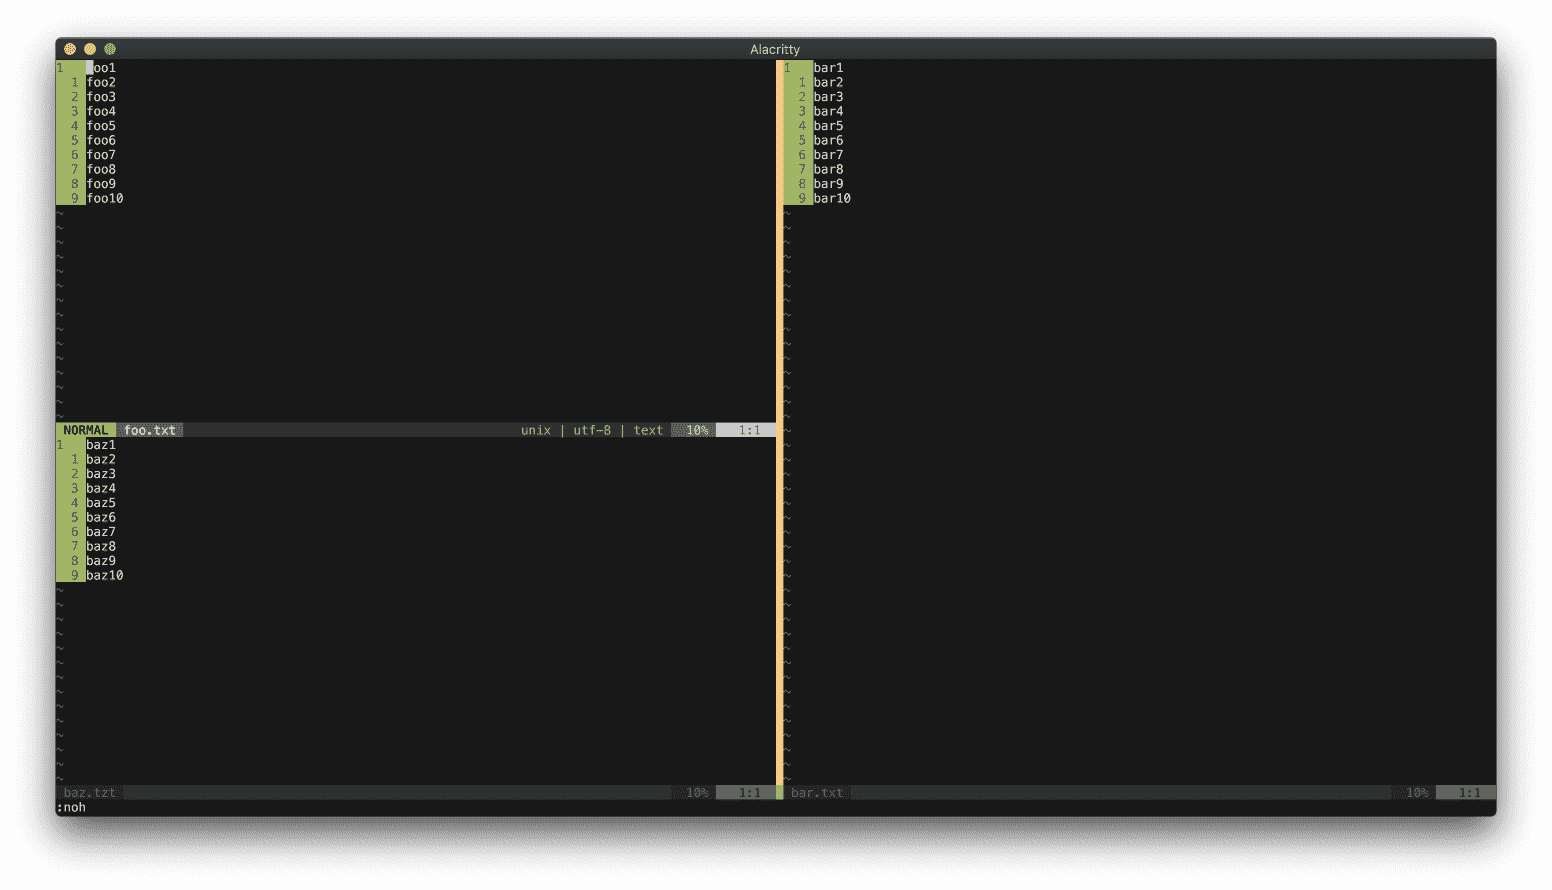
To save the Session, run:
:mksession
Unlike mkview where it saves to ~/.vim/view by default, mksession saves a Session file (Session.vim) in the current directory. Check out the file if you're curious what's inside.
If you want to save the Session file somewhere else, you can pass an argument to mksession:
:mksession ~/some/where/else.vim
If you want to overwrite the existing Session file, call the command with a ! (:mksession! ~/some/where/else.vim).
Loading A Session
To load a Session, run:
:source Session.vim
Session.vim is the Session file. Now Vim looks like the way you left it. Alternatively, you can also load a Session file from the terminal:
vim -S Session.vim
Configuring Session Attributes
You can configure the attributes Session saves. To see what is currently being saved, run:
:set sessionoptions?
Mine says:
blank,buffers,curdir,folds,help,tabpages,winsize,terminal
Yours might look different. To add or remove an option, you can use += or =.
If you don't want to save terminal when you save a Session, run:
:set sessionoptions-=terminal
If you want to add an options when you save a Session, run:
:set sessionoptions+=options
Here are some attributes that sessionoptions can store:
blankstores empty windowsbuffersstores buffersfoldsstores foldsglobalsstores global variables (must start with an uppercase letter and contain at least one lowercase letter)optionsstores options and mappingsresizestores window lines and columnswinposstores window positionwinsizestores window sizestabpagesstores tabsunixstores files in Unix format
For the complete list check out :h 'sessionoptions'.
Session is a useful tool to preserve your project's external attributes. However, there are a number of internal attributes that Session doesn't save: local marks, registers, histories, etc.
To save them, you need to use Viminfo!
Viminfo
After yanking a word into register a and quitting Vim, the next time you open Vim you can immediately paste the text from register a. This is actually one of Viminfo's features. Without it, Vim won't remember the register after you close.
If you use Vim 8 or higher, Vim enables Viminfo by default, so you may have been using Vim info this whole time without knowing it!
You might ask: "What does Viminfo save? How does it differ from Session?"
You just learned the things that Session saves from sessionoptions. To use Viminfo, first you need to have +viminfo feature available (:version). Viminfo stores:
- The command-line history.
- The search string history.
- The input-line history.
- Contents of non-empty registers.
- Marks for several files.
- File marks, pointing to locations in files.
- Last search / substitute pattern (for 'n' and '&').
- The buffer list.
- Global variables.
When comparing the items that can be saved for Session and Viminfo, you will notice that sessionoptions, in general, saves the "external" attributes while viminfo saves the "internal" attributes.
Unlike Session where you can have one Session file per project, you normally will use one Viminfo file per computer. Viminfo is project-agnostic.
The default Viminfo location for Unix is $HOME/.viminfo (~/.viminfo). If you use a different OS, your Viminfo location might be different. Check out :h viminfo-file-name. Each time you make "internal" changes, like yanking a text into a register, Vim automatically updates the Viminfo file.
Make sure that you have nocompatible option set (set nocompatible), otherwise your Viminfo will not work.
Writing And Reading Viminfo
Although you will use only one Viminfo file, you can create multiple Viminfo files. To write a Viminfo file, use the :wviminfo command (:wv for short).
:wv ~/.viminfo_extra
To overwrite an existing Viminfo file, add a bang to the wv command:
:wv! ~/.viminfo_extra
By default Vim will read from ~/.viminfo file. To read from a different Viminfo file, run :rviminfo, or :rv for short:
:rv ~/.viminfo_extra
You can also start Vim with a different Viminfo file from the terminal with the i flag:
vim -i viminfo_extra
Multiple Viminfo files can be used to create several different settings for different text editing needs:
vim -i viminfo_writing

vim -i viminfo_coding
Starting Vim Without Viminfo
To start Vim without Viminfo data, you can run from the terminal:
vim -i NONE
To make it permanent, you can add this in your vimrc file:
set viminfo="NONE"
Configuring Viminfo Attributes
Similar to viewoptions and sessionoptions, you can instruct what attributes to save with the viminfo option. Run:
:set viminfo?
You will get:
!,'100,<50,s10,h
This looks cryptic. Let's break it down:
!saves global variables that start with an uppercase letter and don't contain lowercase letters. Recall thatg:indicates a global variable. For example, if you call:let g:FOO = "foo", Viminfo will save the global variableFOO. However if you do:let g:Foo = "foo", Viminfo will not save this global variable because it contains lowercase letters. Without!, Vim won't safe those global variables.'100represents marks. In this case, Viminfo will save the local marks (a-z) of the last 100 files. Be aware that if you tell Viminfo to save too many files, Vim can start slowing down. 100-1000 files is a good range.<50tells Viminfo how many lines are saved for each registers (50 or less in this case). If I yank 100 lines of text into register a ("ay99j) and close Vim, the next time I open Vim and paste from register a ("ap), Vim will only paste 50 lines max. If you don't give it anything, all lines will be saved (it might slow down Vim). If you give it a 0, nothing will be saved.s10sets a size limit (in kb) for a register. In this case, any register greater than 10kb size will be excluded.hdisables highlighting (fromhlsearch) when Vim starts.
There are other options. To learn more, check out :h 'viminfo'.
Using Views, Sessions, And Viminfo The Smart Way
Vim has View, Session, and Viminfo to take different level of "snapshot" of your Vim environment. For small projects, use Views. For larger projects, use Sessions. You should take your time to check out all the options that View, Session, and Viminfo offers.
Create your own View, Session, and Viminfo for your own editing style. Store them in your dotfiles. If you ever need to use Vim outside of your computer, you can just load your settings and you will immediately feel at home!