11 KiB
| title | metaTitle | metaDescription |
|---|---|---|
| Git | Git | How to integrate Vim and git. |
Vim and git are two great tools for two different things. Git is a version control tool. Vim is a text editor. In this chapter, you will learn different ways to integrate Vim and git together.
Diffing
In the last chapter, you saw how you can run a vimdiff command to show differences between multiple files.
Suppose you have two files, file1.txt and file2.txt. Inside file1.txt:
pancakes
waffles
apples

milk
apple juice

yogurt
Inside file2.txt:
pancakes
waffles
oranges

milk
orange juice

yogurt
To see the differences between both files, run:
vimdiff file1.txt file2.txt
Alternatively you could run:
vim -d file1.txt file2.txt
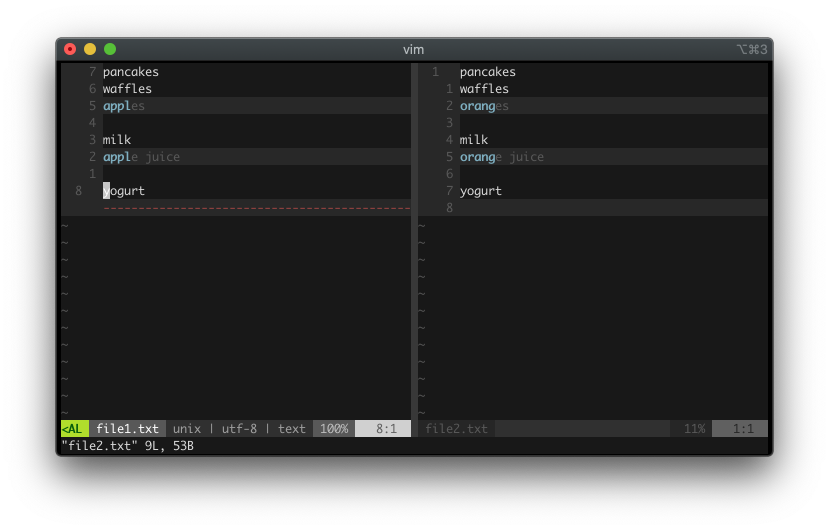
vimdiff displays two buffers side-by-side. On the left is file1.txt and on the right is file2.txt. The two differences (apples and oranges) are highlighted on both lines.
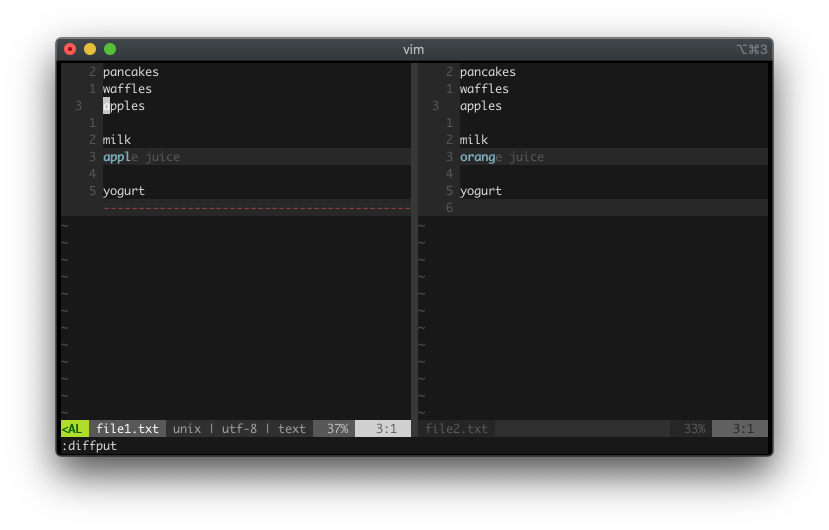
Suppose you want to make the second buffer to have apples, not oranges. To transfer the content from your current position, file1.txt, to file2.txt, jump to the next diff with ]c (to jump to the previous diff, use [c). The cursor should be on apples now. Run :diffput. Both files should now have apples.
If you need to transfer the text from the other buffer (orange juice) to replace the text on the current buffer (apple juice), first jump to the next diff with ]c. Your cursor now should be on apple juice. Run :diffget to get the orange juice from another buffer to replace apple juice in our buffer.
:diffput puts out the text from the current buffer to another buffer. :diffget gets the text from another buffer to the current buffer. If you have multiple buffers, you can run :diffput fileN.txt and :diffget fileN.txt to target the fileN buffer.
Vim As A Merge Tool
"I love resolving merge conflicts!" - Nobody
I don't know anyone who likes resolving merge conflicts. However, they are inevitable. In this section, you will learn how to leverage Vim as a merge conflict resolution tool.
First, change the default merge tool to use vimdiff by running:
git config merge.tool vimdiff
git config merge.conflictstyle diff3
git config mergetool.prompt false
Alternatively, you can modify the ~/.gitconfig directly (by default it should be in root, but yours might be in different place). If you haven't already, make your gitconfig to look like:
[core]
  editor = vim
[merge]
  tool = vimdiff
  conflictstyle = diff3
[difftool]
  prompt = false
Let's create a fake merge conflict to test this out. Create a directory /food and make it a git repository:
git init
Add a file, breakfast.txt. Inside:
pancakes
waffles
oranges
Add the file and commit it:
git add .
git commit -m "Initial breakfast commit"
Next, create a new branch and call it apples branch:
git checkout -b apples
Change the breakfast.txt:
pancakes
waffles
apples
Save the file, then add and commit the change:
git add .
git commit -m "Apples not oranges"
Great. Now you have oranges in the master branch and apples in the apples branch. Let's return to the master branch:
git checkout master
Inside breakfast.txt, you should see the base text, oranges. Let's change it to grapes because they are in season right now:
pancakes
waffles
grapes
Save, add, and commit:
git add .
git commit -m "Grapes not oranges"
Phew, that's a lot of setup. Now you are ready to merge the apples branch into the master branch:
git merge apples
You should see an error:
Auto-merging breakfast.txt
CONFLICT (content): Merge conflict in breakfast.txt
Automatic merge failed; fix conflicts and then commit the result.
A conflict, great! Let's resolve the conflict using our newly-configured mergetool. Run:
git mergetool
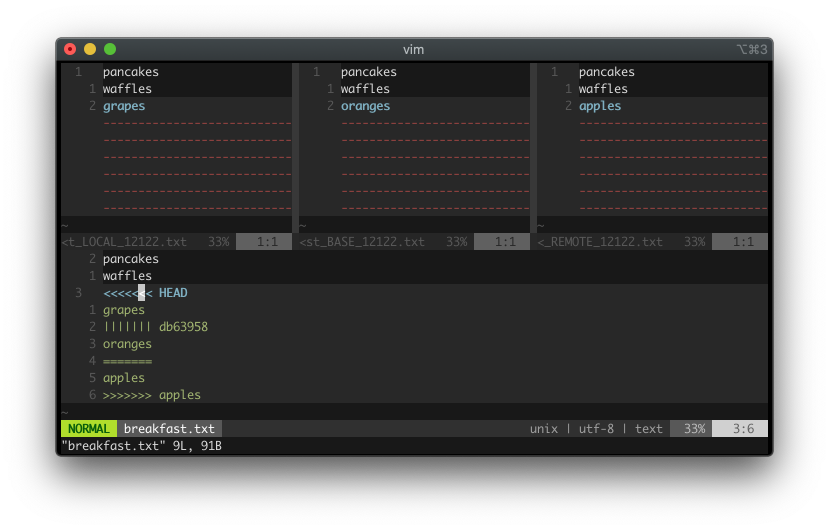
Vim displays four windows. Pay attention to the top three:
LOCALcontainsgrapes. This is the change in "local", what you are merging into.BASEcontainsoranges. This is the common ancestor betweenLOCALandREMOTEto compare how they diverge.REMOTEcontainsapples. This is what is being merged into.
At the bottom (the fourth window) you see:
pancakes
waffles
<<<<<<< HEAD
grapes
||||||| db63958
oranges
=======
apples
>>>>>>> apples
The fourth window contains the merge conflict texts. With this setup, it is easier to see what change each environment has. You can see the content from LOCAL, BASE, and REMOTE at the same time. If you want to get the change from LOCAL (grapes), with the cursor over the highlighted areas, from the fourth window, run :diffget LOCAL. Likewise, if you want to get the change from BASE (oranges), run :diffget BASE and if you want to get the change from REMOTE (apples), run :diffget REMOTE.
In this case, let's get the change from LOCAL. Run :diffget LO (short for LOCAL). The fourth window will now have grapes. Save and exit all files (:qall) when you are done. That wasn't bad, right?
If you notice, you also have a file breakfast.txt.orig now. Git creates a backup file in case things don't go well. If you don't want git to create a backup during a merge, run:
git config --global mergetool.keepBackup false
Git Inside Vim
Vim does not have a native git integration. However, one way to run git commands from Vim is to use the bang operator, !, in the command-line mode.
Any git command can be run with !:
:!git status
:!git commit
:!git diff
:!git push origin master
You can also use Vim's % (current buffer) or # (other buffer) conventions:
:!git add %         " git add current file
:!git checkout #    " git checkout the other file
Plugins
To integrate git inside Vim, you have to use plugins. Below is a list of popular git-related plugins for Vim:
One of the most popular ones is vim-fugitive. For the remaining of the chapter, I will go over a several git workflow using this plugin.
Vim-Fugitive
The vim-fugitive plugin allows you to run the git CLI without leaving the Vim editor. You will find that some commands are better when executed from inside Vim.
To get started, install the vim-fugitive with a vim plugin manager ( vim-plug, vundle, dein.vim, etc).
Git Status
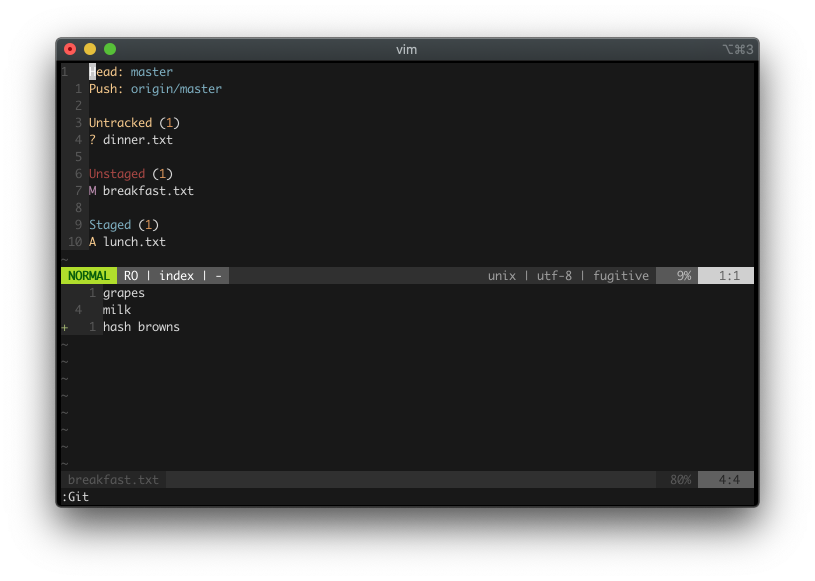
When you run the :Git command without any parameters, vim-fugitive displays a git summary window. It shows the untracked, unstaged, and staged file(s). While in this "git status" mode, you can do several things:
Ctrl-n/Ctrl-pto go up or down the file list.-to stage or unstage the file name under the cursor.sto stage the file name under the cursor.uto unstage the file name under the cursor.>/<to display or hide an inline diff of the file name under the cursor.
For more, check out :h fugitive-staging-maps.
Git Blame
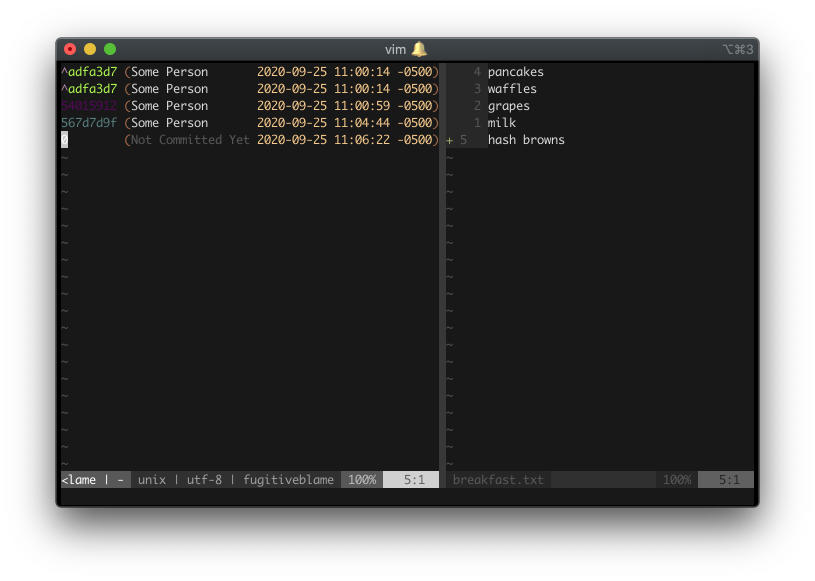
When you run the :Git blame command from the current file, vim-fugitive displays a split blame window. This can be useful to see the person responsible for writing that buggy line of code so you can yell at him / her (that person is probably me).
Some things you can do while in this "git blame" mode:
qto close the blame window.Ato resize the author column.Cto resize the commit column.Dto resize the date / time column.
For more, check out :h :Git_blame.
Gdiffsplit
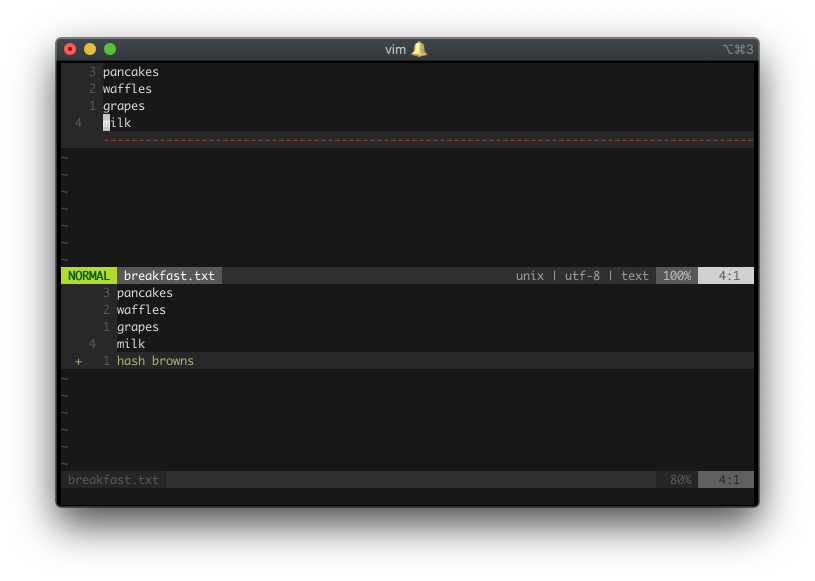
When you run the :Gdiffsplit command, vim-fugitive runs a vimdiff of the current file's latest changes against the index or work tree. If you run :Gdiffsplit <commit>, vim-fugitive runs a vimdiff against that file inside <commit>.
Because you are in a vimdiff mode, you can get or put the diff with :diffput and :diffget.
Gwrite And Gread
When you run the :Gwrite command in a file after you make changes, vim-fugitive stages the changes. It is like running git add <current-file>.
When you run the :Gread command in a file after you make changes, vim-fugitive restores the file to the state prior to the changes. It is like running git checkout <current-file>. One advantage of running :Gread is the action is undo-able. If, after you run :Gread, you change your mind and want to keep the old change, you can just run undo (u) and Vim will undo the :Gread action. This would not have been possible if you had run git checkout <current-file> from the CLI.
Gclog
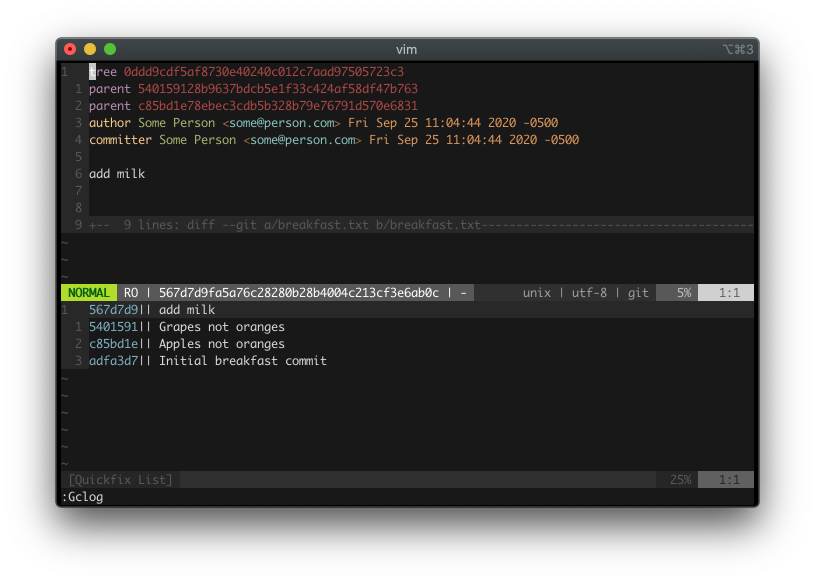
When you run the :Gclog command, vim-fugitive displays the commit history. It is like running the git log command. Vim-fugitive uses Vim's quickfix to accomplish this, so you can use :cnext and :cprevious to traverse to the next or previous log information. You can open and close the log list with :copen and :cclose.
While in this "git log" mode, you can do two things:
- View the tree.
- Visit the parent (the previous commit).
You can pass to :Gclog arguments just like the git log command. If your project has a long commit history and you only need to view the last three commits, you can run :Gclog -3. If you need to filter it based on the committer's date, you can run something like :Gclog --after="January 1" --before="March 14".
More Vim-Fugitive
These are only a few examples of what vim-fugitive can do. To learn more about vim-fugitive, check out :h fugitive.txt. The point is, most / all popular git commands probably have their vim-fugitive version. You just have to look for them in the documentation.
If you are inside one of vim-fugitive's "special mode" (for example, inside :Git or :Git blame mode) and you want to learn what shortcuts are available, press g?. Vim-fugitive will display the appropriate :help window for the mode you are in. Neat!
Learn Vim And Git The Smart Way
Everybody has a different git workflow. You may find vim-fugitive to be a good compliment to your workflow (or not). Regardless, I would strongly encourage you to check out all the plugins listed above. There are probably others I didn't list. Use the best tool for the job.
One obvious way to get better with Vim-git integration is to read more about git. Git, on its own, is a vast topic and I am only showing a small part of it. With that, let's git going (pardon the pun) and talk about how to use Vim to compile your code!
