4.6 KiB
How to use GlosSI 📖
Table of contents
Installation 💿
Installer
- Install, Reboot, Go! 🏎️
.zip file
- Extract the .zip-file to any directory on your computer
- Install vc_redist_x64.msi
- Install ViGEmBusSetup_x64.exe
- Install HidHideSetup.exe
- Reboot(!)
That's it! You're ready to use GlosSI 🙌
Usage 🕹️
Prerequisites 🚨
- Enable "XBox configuration support" in Steam
- Have Steam running
Quick usage ⏱️ (Handy for troubleshooting!)
- Add
GlosSITarget.exeas a non-Steam Game to Steam - Setup controller configuration for the newly added shortcut in Steam
- Launch GlosSITarget from Steam
That's it! 🎉
You can now launch any game/application just like you would without Steam.
Enjoy global SteamInput as well as a systemwide Steam overlay. 💻🎮
Please note: The overlay only works with borderless window mode, not exclusive fullscreen.
In this mode, the overlay also does not work with UWP (≙ Windows Store)
(When not manually enabled in GlosSI-overlay after launch)
See Comfy usage, configuration
Comfy usage 🧸
Since launching one thing from Steam and then launching a game outside of Steam is tedious, and leaves you with only a single controller configuration, GlosSI provides a handy shortcut-management and config app
Here's the basic gist to get you up and running using GlosSI
- Launch GlosSIConfig.exe
- Click the ➕-button to add a new shortcut that GlosSI should manage
- Select the type of app you want GlosSI to launch for you
- Select UWP App for Windows-Store Apps
- Select Win32 Program for "classic" programs and games
- Select Add Manually in case you don't want GlosSI to launch anything or want to set up game launching at a later stage.
- If you have selected Add Manually enter the desired name for the shortcut
- Click the 💾 Save-button
- Click the ➕ to Steam-button
- Optional Repeat steps 2-5 if you want to add multiple shortcuts
- Restart Steam
- Setup controller configuration for the newly added shortcut in Steam
- Search and launch your newly added shortcut from Steam
That's it! 🎉
GlosSI should now launch your game, draw the SteamOverlay on top of it (borderless window and UWP only) and provide controller input redirection. 💻🎮
Screenies 📸
Configuration ⚙️
Pre-Launch configuration (GlosSIConfig)
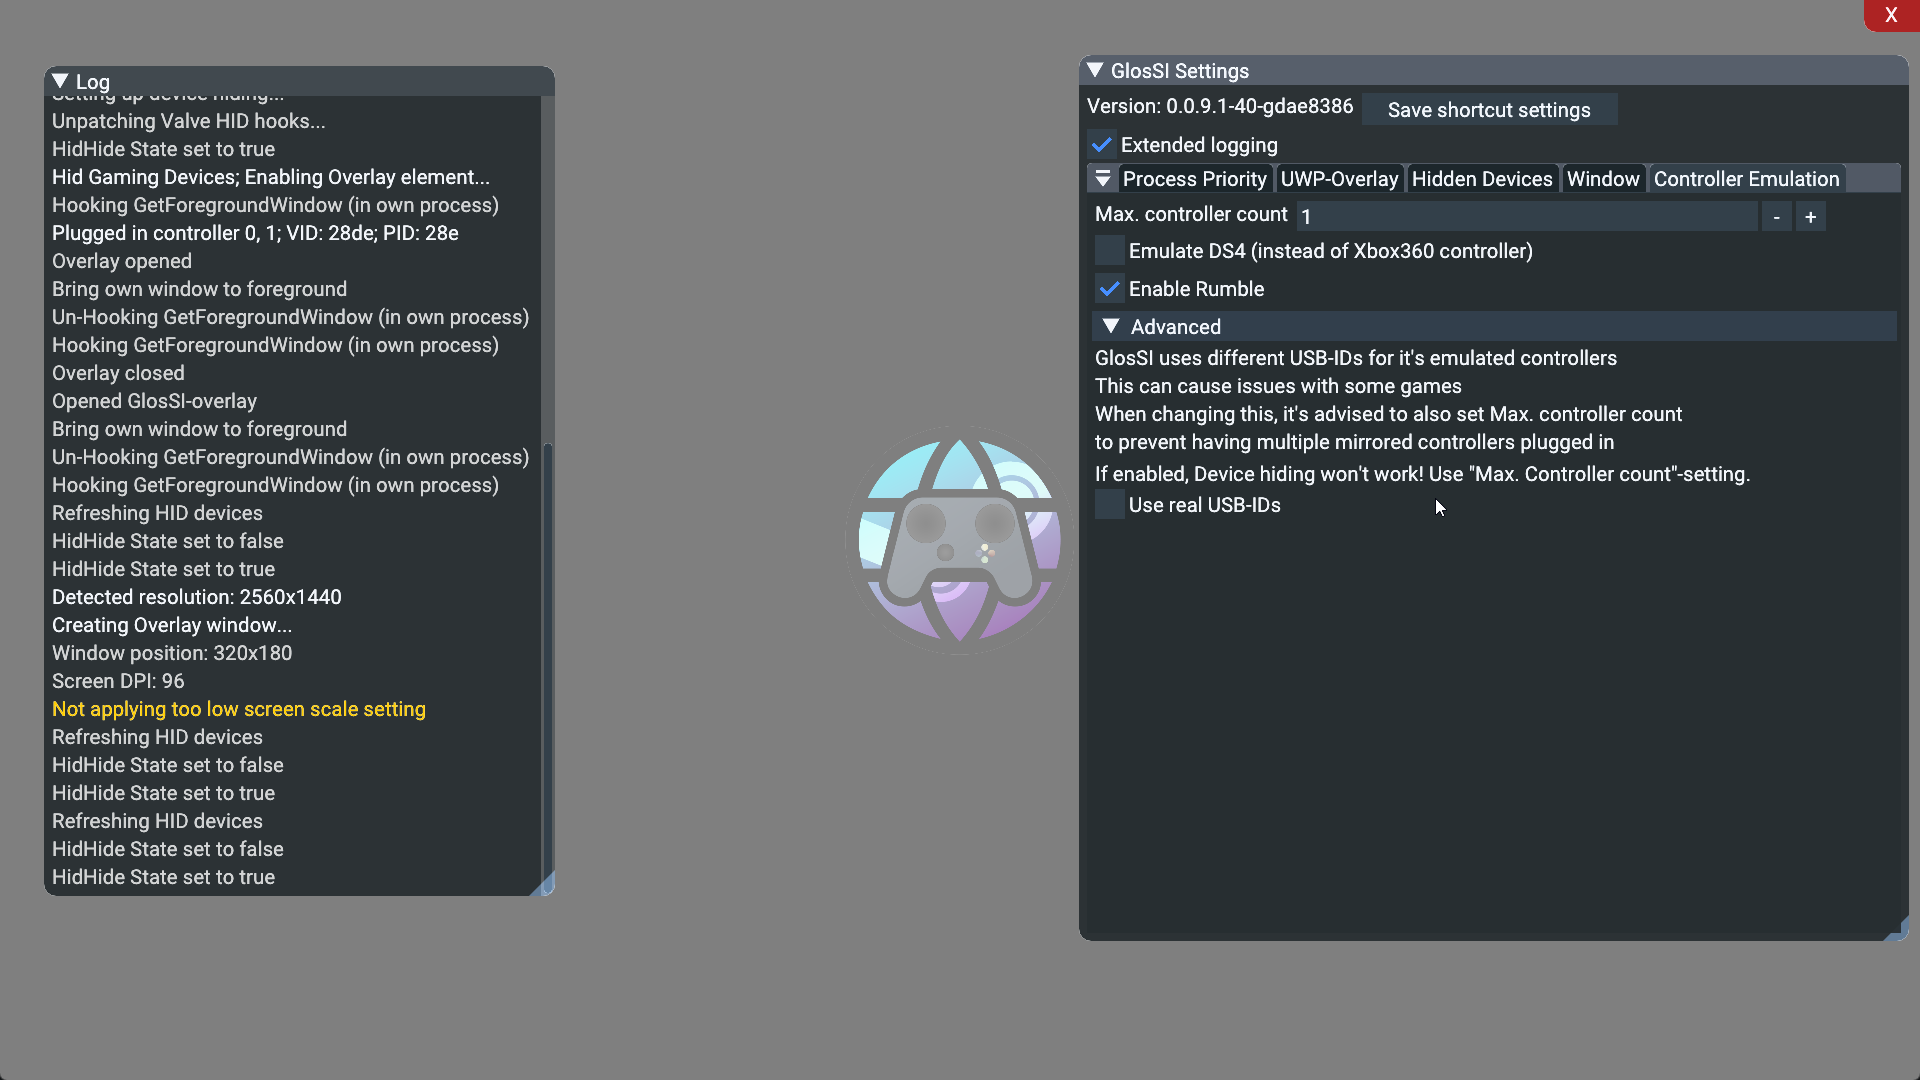
GlosSIConfig provides a fair share of configuration options to tweak features to your liking as well as aid in troubleshooting.
Most of the options have a ?-button next to them that will provide a short description of what the option does.
You do not need to worry about the advanced options too much, though, as the sane defaults should work for most supported use-cases
On-the-fly configuration (GlosSI overlay)
Most, if not all, configuration options that are available in GlosSIConfig can also be changed on the fly using the GlosSI overlay.
To open/close the GlosSI overlay, open and close the SteamOverlay twice in rapid succession.
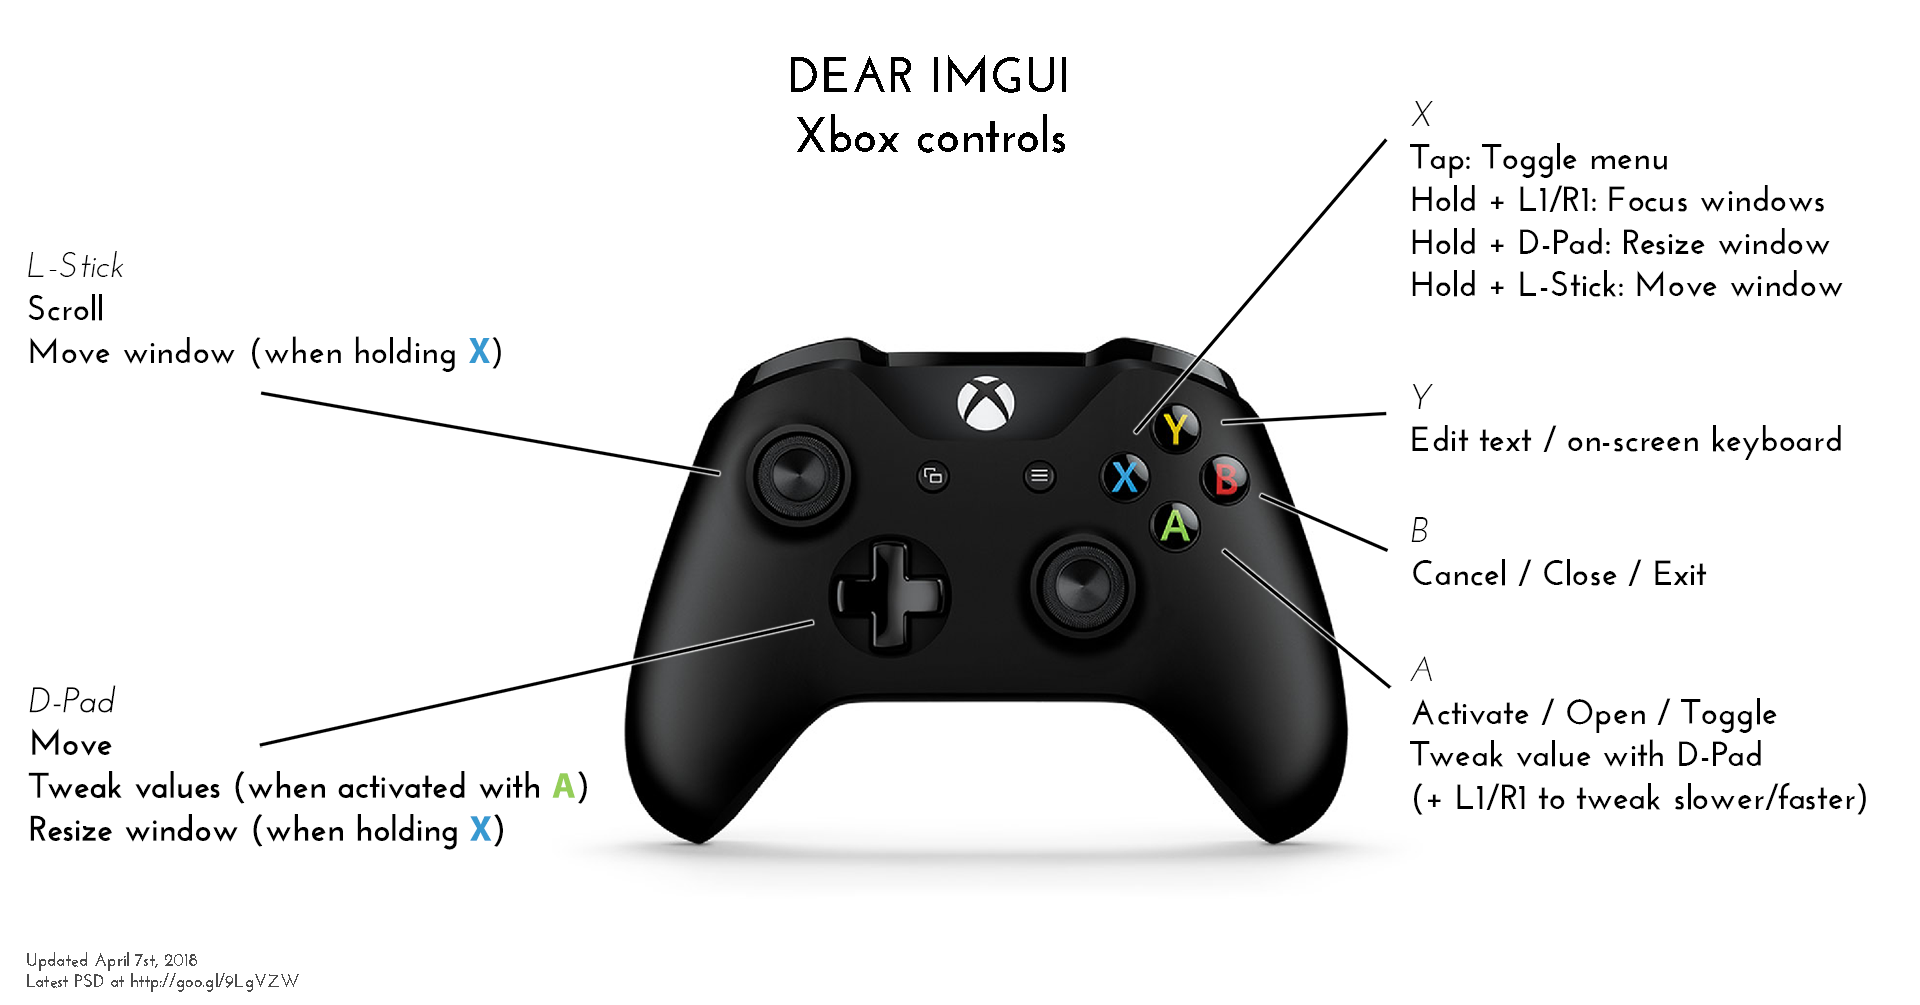
The GlosSI overlay can also be navigated with controller-inputs
Screenies 📸
Neat tips and tricks 😎
-
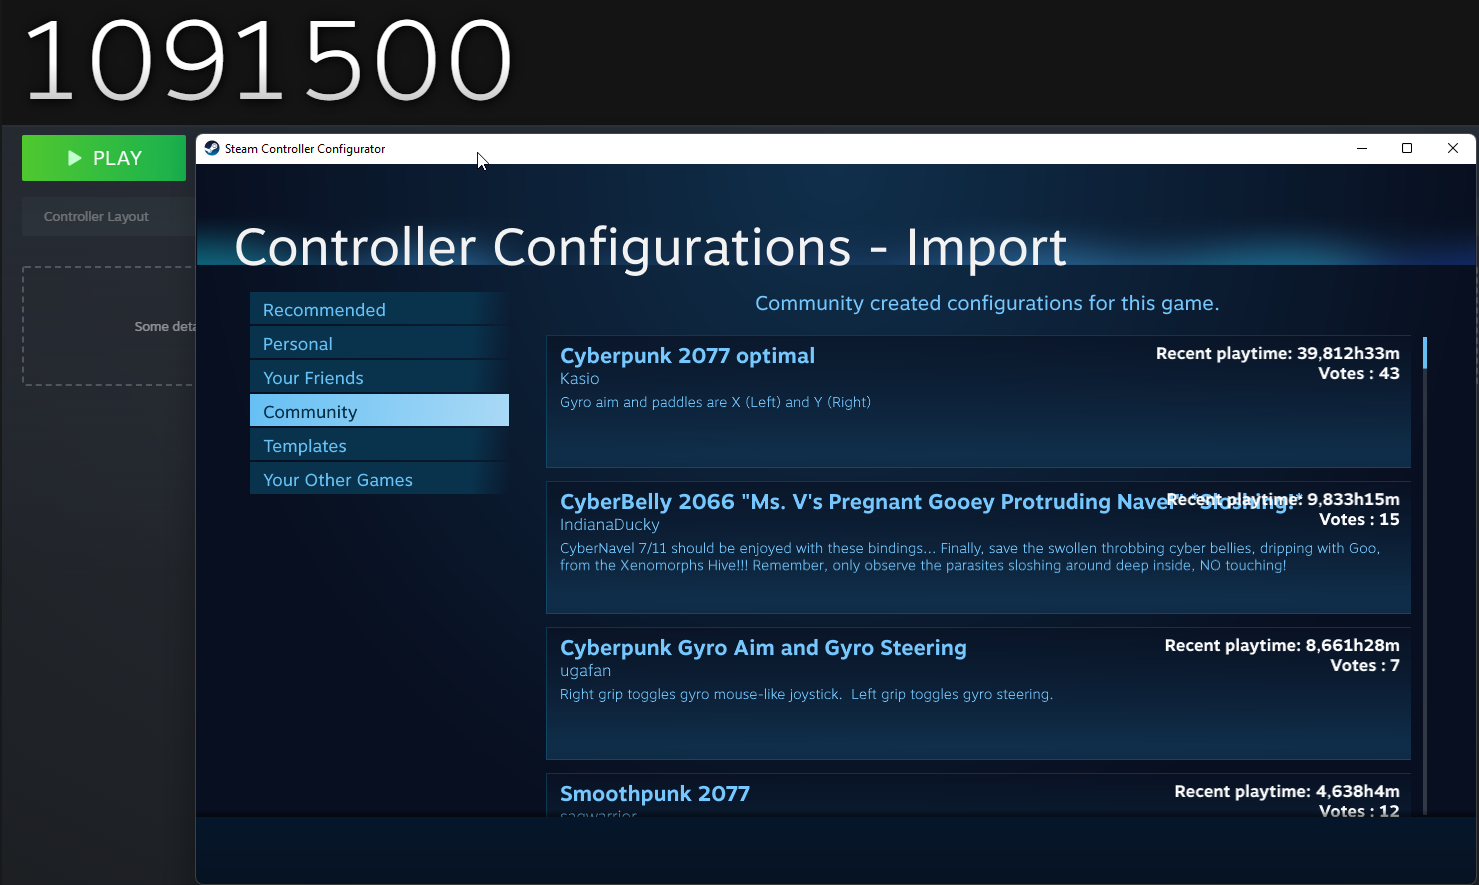
Want to use Steam community controller configs for a game you bought on a different store than Steam?
Rename the shortcut in Steam to the Steam-AppID of the game you want to access to community-configs.
Community configs may only be available before you launch the shortcut.
AppIDs can be retrieved from SteamDB or SteambaseScreenie 📸