| .. | ||
| ambient_diffuse_lighting.png | ||
| ambient_diffuse_specular_lighting.png | ||
| ambient_diffuse_wrong.png | ||
| ambient_lighting.png | ||
| diffuse_right.png | ||
| diffuse_wrong.png | ||
| half_dir.png | ||
| light-in-scene.png | ||
| normal_diagram.png | ||
| normal_diagram.xcf | ||
| normal_not_rotated.png | ||
| normal_not_rotated.xcf | ||
| normal-scale-issue.png | ||
| README.md | ||
| specular_diagram.png | ||
| specular_diagram.xcf | ||
| specular_lighting.png | ||
Working with Lights
While we can tell that our scene is 3d because of our camera, it still feels very flat. That's because our model stays the same color regardless of how it's oriented. If we want to change that we need to add lighting to our scene.
In the real world, a light source emits photons that bounce around until they enter our eyes. The color we see is the light's original color minus whatever energy it lost while it was bouncing around.
In the computer graphics world, modeling individual photons would be hilariously computationally expensive. A single 100 Watt light bulb emits about 3.27 x 10^20 photons per second. Just imagine that for the sun! To get around this, we're gonna use math to cheat.
Let's discuss a few options.
Ray/Path Tracing
This is an advanced topic, and we won't be covering it in depth here. It's the closest model to the way light really works so I felt I had to mention it. Check out the ray tracing tutorial if you want to learn more.
The Blinn-Phong Model
Ray/path tracing is often too computationally expensive for most real-time applications (though that is starting to change), so a more efficient, if less accurate method based on the Phong reflection model is often used. It splits up the lighting calculation into three (3) parts: ambient lighting, diffuse lighting, and specular lighting. We're going to be learning the Blinn-Phong model, which cheats a bit at the specular calculation to speed things up.
Before we can get into that though, we need to add a light to our scene.
// lib.rs
#[repr(C)]
#[derive(Debug, Copy, Clone, bytemuck::Pod, bytemuck::Zeroable)]
struct LightUniform {
    position: [f32; 3],
    // Due to uniforms requiring 16 byte (4 float) spacing, we need to use a padding field here
    _padding: u32,
    color: [f32; 3],
    // Due to uniforms requiring 16 byte (4 float) spacing, we need to use a padding field here
    _padding2: u32,
}
Our LightUniform represents a colored point in space. We're just going to use pure white light, but it's good to allow different colors of light.
The rule of thumb for alignment with WGSL structs is field alignments are
always powers of 2. For example, a vec3 may only have 3 float fields giving
it a size of 12, the alignment will be bumped up to the next power of 2 being
16. This means that you have to be more careful with how you layout your struct
in Rust.
Some developers choose the use vec4s instead of vec3s to avoid alignment
issues. You can learn more about the alignment rules in the wgsl spec
We're going to create another buffer to store our light in.
let light_uniform = LightUniform {
    position: [2.0, 2.0, 2.0],
    _padding: 0,
    color: [1.0, 1.0, 1.0],
    _padding2: 0,
};

 // We'll want to update our lights position, so we use COPY_DST
let light_buffer = device.create_buffer_init(
    &wgpu::util::BufferInitDescriptor {
        label: Some("Light VB"),
        contents: bytemuck::cast_slice(&[light_uniform]),
        usage: wgpu::BufferUsages::UNIFORM | wgpu::BufferUsages::COPY_DST,
    }
);
Don't forget to add the light_uniform and light_buffer to State. After that, we need to create a bind group layout and bind group for our light.
let light_bind_group_layout =
    device.create_bind_group_layout(&wgpu::BindGroupLayoutDescriptor {
        entries: &[wgpu::BindGroupLayoutEntry {
            binding: 0,
            visibility: wgpu::ShaderStages::VERTEX | wgpu::ShaderStages::FRAGMENT,
            ty: wgpu::BindingType::Buffer {
                ty: wgpu::BufferBindingType::Uniform,
                has_dynamic_offset: false,
                min_binding_size: None,
            },
            count: None,
        }],
        label: None,
    });

let light_bind_group = device.create_bind_group(&wgpu::BindGroupDescriptor {
    layout: &light_bind_group_layout,
    entries: &[wgpu::BindGroupEntry {
        binding: 0,
        resource: light_buffer.as_entire_binding(),
    }],
    label: None,
});
Add those to State, and also update the render_pipeline_layout.
let render_pipeline_layout = device.create_pipeline_layout(&wgpu::PipelineLayoutDescriptor {
    bind_group_layouts: &[
        &texture_bind_group_layout,
        &camera_bind_group_layout,
        &light_bind_group_layout,
    ],
});
Let's also update the light's position in the update() method, so we can see what our objects look like from different angles.
// Update the light
let old_position: cgmath::Vector3<_> = self.light_uniform.position.into();
self.light_uniform.position =
    (cgmath::Quaternion::from_axis_angle((0.0, 1.0, 0.0).into(), cgmath::Deg(1.0))
        * old_position)
        .into();
self.queue.write_buffer(&self.light_buffer, 0, bytemuck::cast_slice(&[self.light_uniform]));
This will have the light rotate around the origin one degree every frame.
Seeing the light
For debugging purposes, it would be nice if we could see where the light is to make sure that the scene looks correct. We could adapt our existing render pipeline to draw the light, but it will likely get in the way. Instead, we are going to extract our render pipeline creation code into a new function called create_render_pipeline().
fn create_render_pipeline(
    device: &wgpu::Device,
    layout: &wgpu::PipelineLayout,
    color_format: wgpu::TextureFormat,
    depth_format: Option<wgpu::TextureFormat>,
    vertex_layouts: &[wgpu::VertexBufferLayout],
    shader: wgpu::ShaderModuleDescriptor,
) -> wgpu::RenderPipeline {
    let shader = device.create_shader_module(shader);

    device.create_render_pipeline(&wgpu::RenderPipelineDescriptor {
        label: Some("Render Pipeline"),
        layout: Some(layout),
        vertex: wgpu::VertexState {
            module: &shader,
            entry_point: "vs_main",
            buffers: vertex_layouts,
        },
        fragment: Some(wgpu::FragmentState {
            module: &shader,
            entry_point: "fs_main",
            targets: &[Some(wgpu::ColorTargetState {
                format: color_format,
                blend: Some(wgpu::BlendState {
                    alpha: wgpu::BlendComponent::REPLACE,
                    color: wgpu::BlendComponent::REPLACE,
                }),
                write_mask: wgpu::ColorWrites::ALL,
            })],
        }),
        primitive: wgpu::PrimitiveState {
            topology: wgpu::PrimitiveTopology::TriangleList,
            strip_index_format: None,
            front_face: wgpu::FrontFace::Ccw,
            cull_mode: Some(wgpu::Face::Back),
            // Setting this to anything other than Fill requires Features::NON_FILL_POLYGON_MODE
            polygon_mode: wgpu::PolygonMode::Fill,
            // Requires Features::DEPTH_CLIP_CONTROL
            unclipped_depth: false,
            // Requires Features::CONSERVATIVE_RASTERIZATION
            conservative: false,
        },
        depth_stencil: depth_format.map(|format| wgpu::DepthStencilState {
            format,
            depth_write_enabled: true,
            depth_compare: wgpu::CompareFunction::Less,
            stencil: wgpu::StencilState::default(),
            bias: wgpu::DepthBiasState::default(),
        }),
        multisample: wgpu::MultisampleState {
            count: 1,
            mask: !0,
            alpha_to_coverage_enabled: false,
        },
        multiview: None,
    })
}
We also need to change State::new() to use this function.
let render_pipeline = {
    let shader = wgpu::ShaderModuleDescriptor {
        label: Some("Normal Shader"),
        source: wgpu::ShaderSource::Wgsl(include_str!("shader.wgsl").into()),
    };
    create_render_pipeline(
        &device,
        &render_pipeline_layout,
        config.format,
        Some(texture::Texture::DEPTH_FORMAT),
        &[model::ModelVertex::desc(), InstanceRaw::desc()],
        shader,
    )
};
We're going to need to modify model::DrawModel to use our light_bind_group.
// model.rs
pub trait DrawModel<'a> {
    fn draw_mesh(
        &mut self,
        mesh: &'a Mesh,
        material: &'a Material,
        camera_bind_group: &'a wgpu::BindGroup,
        light_bind_group: &'a wgpu::BindGroup,
    );
    fn draw_mesh_instanced(
        &mut self,
        mesh: &'a Mesh,
        material: &'a Material,
        instances: Range<u32>,
        camera_bind_group: &'a wgpu::BindGroup,
        light_bind_group: &'a wgpu::BindGroup,
    );

    fn draw_model(
        &mut self,
        model: &'a Model,
        camera_bind_group: &'a wgpu::BindGroup,
        light_bind_group: &'a wgpu::BindGroup,
    );
    fn draw_model_instanced(
        &mut self,
        model: &'a Model,
        instances: Range<u32>,
        camera_bind_group: &'a wgpu::BindGroup,
        light_bind_group: &'a wgpu::BindGroup,
    );
}

impl<'a, 'b> DrawModel<'b> for wgpu::RenderPass<'a>
where
    'b: 'a,
{
    fn draw_mesh(
        &mut self,
        mesh: &'b Mesh,
        material: &'b Material,
        camera_bind_group: &'b wgpu::BindGroup,
        light_bind_group: &'b wgpu::BindGroup,
    ) {
        self.draw_mesh_instanced(mesh, material, 0..1, camera_bind_group, light_bind_group);
    }

    fn draw_mesh_instanced(
        &mut self,
        mesh: &'b Mesh,
        material: &'b Material,
        instances: Range<u32>,
        camera_bind_group: &'b wgpu::BindGroup,
        light_bind_group: &'b wgpu::BindGroup,
    ) {
        self.set_vertex_buffer(0, mesh.vertex_buffer.slice(..));
        self.set_index_buffer(mesh.index_buffer.slice(..), wgpu::IndexFormat::Uint32);
        self.set_bind_group(0, &material.bind_group, &[]);
        self.set_bind_group(1, camera_bind_group, &[]);
        self.set_bind_group(2, light_bind_group, &[]);
        self.draw_indexed(0..mesh.num_elements, 0, instances);
    }

    fn draw_model(
        &mut self,
        model: &'b Model,
        camera_bind_group: &'b wgpu::BindGroup,
        light_bind_group: &'b wgpu::BindGroup,
    ) {
        self.draw_model_instanced(model, 0..1, camera_bind_group, light_bind_group);
    }

    fn draw_model_instanced(
        &mut self,
        model: &'b Model,
        instances: Range<u32>,
        camera_bind_group: &'b wgpu::BindGroup,
        light_bind_group: &'b wgpu::BindGroup,
    ) {
        for mesh in &model.meshes {
            let material = &model.materials[mesh.material];
            self.draw_mesh_instanced(mesh, material, instances.clone(), camera_bind_group, light_bind_group);
        }
    }
}
With that done we can create another render pipeline for our light.
// lib.rs
let light_render_pipeline = {
    let layout = device.create_pipeline_layout(&wgpu::PipelineLayoutDescriptor {
        label: Some("Light Pipeline Layout"),
        bind_group_layouts: &[&camera_bind_group_layout, &light_bind_group_layout],
        push_constant_ranges: &[],
    });
    let shader = wgpu::ShaderModuleDescriptor {
        label: Some("Light Shader"),
        source: wgpu::ShaderSource::Wgsl(include_str!("light.wgsl").into()),
    };
    create_render_pipeline(
        &device,
        &layout,
        config.format,
        Some(texture::Texture::DEPTH_FORMAT),
        &[model::ModelVertex::desc()],
        shader,
    )
};
I chose to create a separate layout for the light_render_pipeline, as it doesn't need all the resources that the regular render_pipeline needs (main just the textures).
With that in place, we need to write the actual shaders.
// light.wgsl
// Vertex shader

struct Camera {
    view_proj: mat4x4<f32>,
}
@group(0) @binding(0)
var<uniform> camera: Camera;

struct Light {
    position: vec3<f32>,
    color: vec3<f32>,
}
@group(1) @binding(0)
var<uniform> light: Light;

struct VertexInput {
    @location(0) position: vec3<f32>,
};

struct VertexOutput {
    @builtin(position) clip_position: vec4<f32>,
    @location(0) color: vec3<f32>,
};

@vertex
fn vs_main(
    model: VertexInput,
) -> VertexOutput {
    let scale = 0.25;
    var out: VertexOutput;
    out.clip_position = camera.view_proj * vec4<f32>(model.position * scale + light.position, 1.0);
    out.color = light.color;
    return out;
}

// Fragment shader

@fragment
fn fs_main(in: VertexOutput) -> @location(0) vec4<f32> {
    return vec4<f32>(in.color, 1.0);
}
Now we could manually implement the draw code for the light in render(), but to keep with the pattern we developed, let's create a new trait called DrawLight.
// model.rs
pub trait DrawLight<'a> {
    fn draw_light_mesh(
        &mut self,
        mesh: &'a Mesh,
        camera_bind_group: &'a wgpu::BindGroup,
        light_bind_group: &'a wgpu::BindGroup,
    );
    fn draw_light_mesh_instanced(
        &mut self,
        mesh: &'a Mesh,
        instances: Range<u32>,
        camera_bind_group: &'a wgpu::BindGroup,
        light_bind_group: &'a wgpu::BindGroup,
    );

    fn draw_light_model(
        &mut self,
        model: &'a Model,
        camera_bind_group: &'a wgpu::BindGroup,
        light_bind_group: &'a wgpu::BindGroup,
    );
    fn draw_light_model_instanced(
        &mut self,
        model: &'a Model,
        instances: Range<u32>,
        camera_bind_group: &'a wgpu::BindGroup,
        light_bind_group: &'a wgpu::BindGroup,
    );
}

impl<'a, 'b> DrawLight<'b> for wgpu::RenderPass<'a>
where
    'b: 'a,
{
    fn draw_light_mesh(
        &mut self,
        mesh: &'b Mesh,
        camera_bind_group: &'b wgpu::BindGroup,
        light_bind_group: &'b wgpu::BindGroup,
    ) {
        self.draw_light_mesh_instanced(mesh, 0..1, camera_bind_group, light_bind_group);
    }

    fn draw_light_mesh_instanced(
        &mut self,
        mesh: &'b Mesh,
        instances: Range<u32>,
        camera_bind_group: &'b wgpu::BindGroup,
        light_bind_group: &'b wgpu::BindGroup,
    ) {
        self.set_vertex_buffer(0, mesh.vertex_buffer.slice(..));
        self.set_index_buffer(mesh.index_buffer.slice(..), wgpu::IndexFormat::Uint32);
        self.set_bind_group(0, camera_bind_group, &[]);
        self.set_bind_group(1, light_bind_group, &[]);
        self.draw_indexed(0..mesh.num_elements, 0, instances);
    }

    fn draw_light_model(
        &mut self,
        model: &'b Model,
        camera_bind_group: &'b wgpu::BindGroup,
        light_bind_group: &'b wgpu::BindGroup,
    ) {
        self.draw_light_model_instanced(model, 0..1, camera_bind_group, light_bind_group);
    }
    fn draw_light_model_instanced(
        &mut self,
        model: &'b Model,
        instances: Range<u32>,
        camera_bind_group: &'b wgpu::BindGroup,
        light_bind_group: &'b wgpu::BindGroup,
    ) {
        for mesh in &model.meshes {
            self.draw_light_mesh_instanced(mesh, instances.clone(), camera_bind_group, light_bind_group);
        }
    }
}
Finally, we want to add Light rendering to our render passes.
impl State {
    // ...
   fn render(&mut self) -> Result<(), wgpu::SurfaceError> {
        // ...
        render_pass.set_vertex_buffer(1, self.instance_buffer.slice(..));

        use crate::model::DrawLight; // NEW!
        render_pass.set_pipeline(&self.light_render_pipeline); // NEW!
        render_pass.draw_light_model(
            &self.obj_model,
            &self.camera_bind_group,
            &self.light_bind_group,
        ); // NEW!

        render_pass.set_pipeline(&self.render_pipeline);
        render_pass.draw_model_instanced(
            &self.obj_model,
            0..self.instances.len() as u32,
            &self.camera_bind_group,
            &self.light_bind_group, // NEW
        );
}
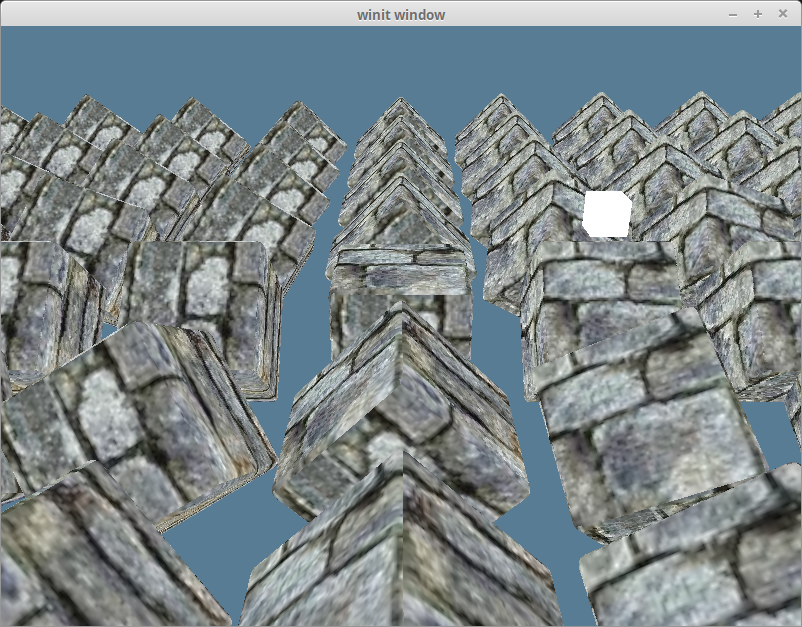
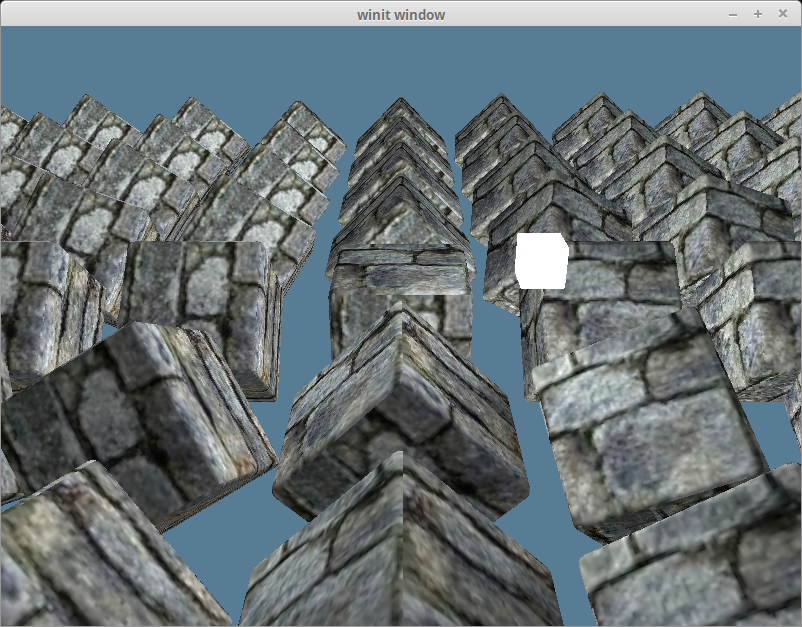
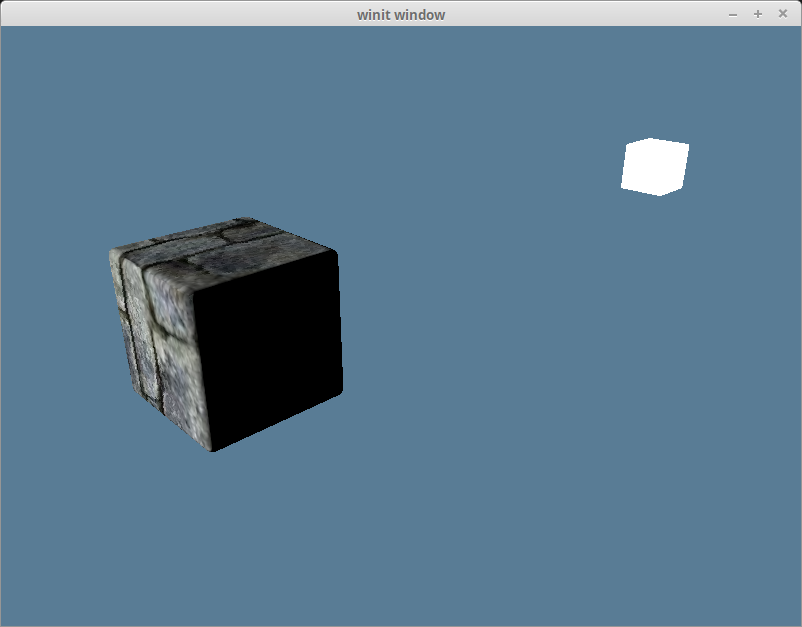
With all that, we'll end up with something like this.
Ambient Lighting
Light has a tendency to bounce around before entering our eyes. That's why you can see in areas that are in shadow. Actually modeling this interaction is computationally expensive, so we cheat. We define an ambient lighting value that stands for the light bouncing off other parts of the scene to light our objects.
The ambient part is based on the light color as well as the object color. We've already added our light_bind_group, so we just need to use it in our shader. In shader.wgsl, add the following below the texture uniforms.
struct Light {
    position: vec3<f32>,
    color: vec3<f32>,
}
@group(2) @binding(0)
var<uniform> light: Light;
Then we need to update our main shader code to calculate and use the ambient color value.
@fragment
fn fs_main(in: VertexOutput) -> @location(0) vec4<f32> {
    let object_color: vec4<f32> = textureSample(t_diffuse, s_diffuse, in.tex_coords);

    // We don't need (or want) much ambient light, so 0.1 is fine
    let ambient_strength = 0.1;
    let ambient_color = light.color * ambient_strength;

    let result = ambient_color * object_color.xyz;

    return vec4<f32>(result, object_color.a);
}
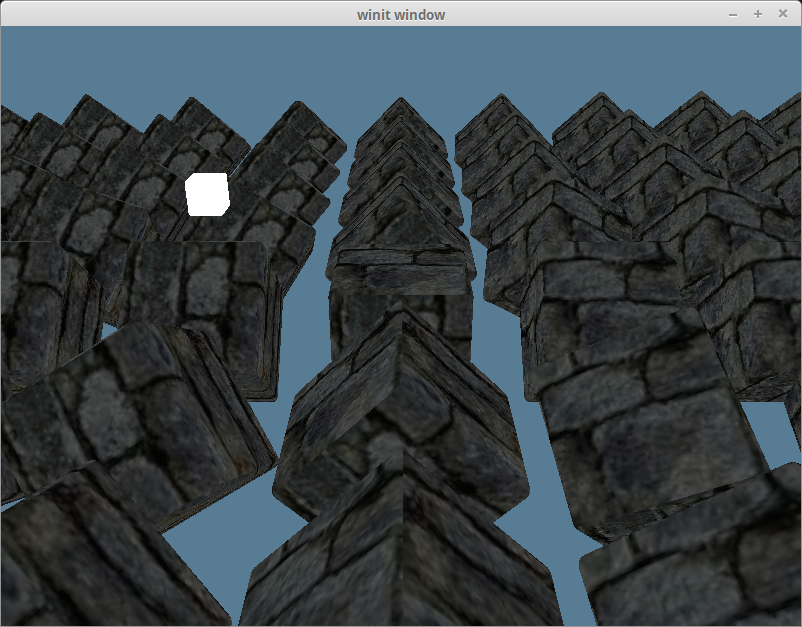
With that, we should get something like this.
Diffuse Lighting
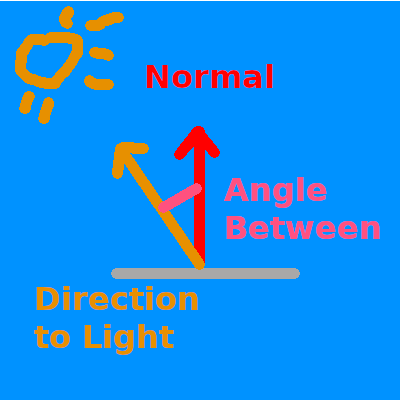
Remember the normal vectors that were included with our model? We're finally going to use them. Normals represent the direction a surface is facing. By comparing the normal of a fragment with a vector pointing to a light source, we get a value of how light/dark that fragment should be. We compare the vector using the dot product to get the cosine of the angle between them.
If the dot product of the normal and light vector is 1.0, that means that the current fragment is directly in line with the light source and will receive the light's full intensity. A value of 0.0 or lower means that the surface is perpendicular or facing away from the light, and therefore will be dark.
We're going to need to pull in the normal vector into our shader.wgsl.
struct VertexInput {
    @location(0) position: vec3<f32>,
    @location(1) tex_coords: vec2<f32>,
    @location(2) normal: vec3<f32>, // NEW!
};
We're also going to want to pass that value, as well as the vertex's position to the fragment shader.
struct VertexOutput {
    @builtin(position) clip_position: vec4<f32>,
    @location(0) tex_coords: vec2<f32>,
    @location(1) world_normal: vec3<f32>,
    @location(2) world_position: vec3<f32>,
};
For now, let's just pass the normal directly as-is. This is wrong, but we'll fix it later.
@vertex
fn vs_main(
    model: VertexInput,
    instance: InstanceInput,
) -> VertexOutput {
    let model_matrix = mat4x4<f32>(
        instance.model_matrix_0,
        instance.model_matrix_1,
        instance.model_matrix_2,
        instance.model_matrix_3,
    );
    var out: VertexOutput;
    out.tex_coords = model.tex_coords;
    out.world_normal = model.normal;
    var world_position: vec4<f32> = model_matrix * vec4<f32>(model.position, 1.0);
    out.world_position = world_position.xyz;
    out.clip_position = camera.view_proj * world_position;
    return out;
}
With that, we can do the actual calculation. Below the ambient_color calculation, but above result, add the following.
let light_dir = normalize(light.position - in.world_position);

let diffuse_strength = max(dot(in.world_normal, light_dir), 0.0);
let diffuse_color = light.color * diffuse_strength;
Now we can include the diffuse_color in the result.
let result = (ambient_color + diffuse_color) * object_color.xyz;
With that, we get something like this.
The normal matrix
Remember when I said passing the vertex normal directly to the fragment shader was wrong? Let's explore that by removing all the cubes from the scene except one that will be rotated 180 degrees on the y-axis.
const NUM_INSTANCES_PER_ROW: u32 = 1;

// In the loop we create the instances in
let rotation = cgmath::Quaternion::from_axis_angle((0.0, 1.0, 0.0).into(), cgmath::Deg(180.0));
We'll also remove the ambient_color from our lighting result.
let result = (diffuse_color) * object_color.xyz;
That should give us something that looks like this.
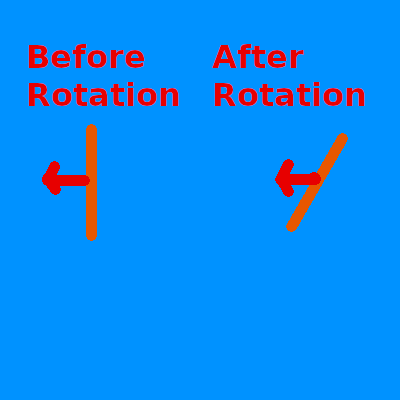
This is clearly wrong as the light is illuminating the wrong side of the cube. This is because we aren't rotating our normals with our object, so no matter what direction the object faces, the normals will always face the same way.
We need to use the model matrix to transform the normals to be in the right direction. We only want the rotation data though. A normal represents a direction and should be a unit vector throughout the calculation. We can get our normals in the right direction using what is called a normal matrix.
We could compute the normal matrix in the vertex shader, but that would involve inverting the model_matrix, and WGSL doesn't actually have an inverse function. We would have to code our own. On top of that computing, the inverse of a matrix is actually really expensive, especially doing that computation for every vertex.
Instead, we're going to add a normal matrix field to InstanceRaw. Instead of inverting the model matrix, we'll just be using the instance's rotation to create a Matrix3.
We are using Matrix3 instead of Matrix4 as we only really need the rotation component of the matrix.
#[repr(C)]
#[derive(Debug, Copy, Clone, bytemuck::Pod, bytemuck::Zeroable)]
#[allow(dead_code)]
struct InstanceRaw {
    model: [[f32; 4]; 4],
    normal: [[f32; 3]; 3],
}

impl model::Vertex for InstanceRaw {
    fn desc<'a>() -> wgpu::VertexBufferLayout<'a> {
        use std::mem;
        wgpu::VertexBufferLayout {
            array_stride: mem::size_of::<InstanceRaw>() as wgpu::BufferAddress,
            // We need to switch from using a step mode of Vertex to Instance
            // This means that our shaders will only change to use the next
            // instance when the shader starts processing a new instance
            step_mode: wgpu::VertexStepMode::Instance,
            attributes: &[
                wgpu::VertexAttribute {
                    offset: 0,
                    // While our vertex shader only uses locations 0, and 1 now, in later tutorials we'll
                    // be using 2, 3, and 4, for Vertex. We'll start at slot 5 not conflict with them later
                    shader_location: 5,
                    format: wgpu::VertexFormat::Float32x4,
                },
                // A mat4 takes up 4 vertex slots as it is technically 4 vec4s. We need to define a slot
                // for each vec4. We don't have to do this in code though.
                wgpu::VertexAttribute {
                    offset: mem::size_of::<[f32; 4]>() as wgpu::BufferAddress,
                    shader_location: 6,
                    format: wgpu::VertexFormat::Float32x4,
                },
                wgpu::VertexAttribute {
                    offset: mem::size_of::<[f32; 8]>() as wgpu::BufferAddress,
                    shader_location: 7,
                    format: wgpu::VertexFormat::Float32x4,
                },
                wgpu::VertexAttribute {
                    offset: mem::size_of::<[f32; 12]>() as wgpu::BufferAddress,
                    shader_location: 8,
                    format: wgpu::VertexFormat::Float32x4,
                },
                // NEW!
                wgpu::VertexAttribute {
                    offset: mem::size_of::<[f32; 16]>() as wgpu::BufferAddress,
                    shader_location: 9,
                    format: wgpu::VertexFormat::Float32x3,
                },
                wgpu::VertexAttribute {
                    offset: mem::size_of::<[f32; 19]>() as wgpu::BufferAddress,
                    shader_location: 10,
                    format: wgpu::VertexFormat::Float32x3,
                },
                wgpu::VertexAttribute {
                    offset: mem::size_of::<[f32; 22]>() as wgpu::BufferAddress,
                    shader_location: 11,
                    format: wgpu::VertexFormat::Float32x3,
                },
            ],
        }
    }
}
We need to modify Instance to create the normal matrix.
struct Instance {
    position: cgmath::Vector3<f32>,
    rotation: cgmath::Quaternion<f32>,
}

impl Instance {
    fn to_raw(&self) -> InstanceRaw {
        let model =
            cgmath::Matrix4::from_translation(self.position) * cgmath::Matrix4::from(self.rotation);
        InstanceRaw {
            model: model.into(),
            // NEW!
            normal: cgmath::Matrix3::from(self.rotation).into(),
        }
    }
}
Now we need to reconstruct the normal matrix in the vertex shader.
struct InstanceInput {
    @location(5) model_matrix_0: vec4<f32>,
    @location(6) model_matrix_1: vec4<f32>,
    @location(7) model_matrix_2: vec4<f32>,
    @location(8) model_matrix_3: vec4<f32>,
    // NEW!
    @location(9) normal_matrix_0: vec3<f32>,
    @location(10) normal_matrix_1: vec3<f32>,
    @location(11) normal_matrix_2: vec3<f32>,
};

struct VertexOutput {
    @builtin(position) clip_position: vec4<f32>,
    @location(0) tex_coords: vec2<f32>,
    @location(1) world_normal: vec3<f32>,
    @location(2) world_position: vec3<f32>,
};

@vertex
fn vs_main(
    model: VertexInput,
    instance: InstanceInput,
) -> VertexOutput {
    let model_matrix = mat4x4<f32>(
        instance.model_matrix_0,
        instance.model_matrix_1,
        instance.model_matrix_2,
        instance.model_matrix_3,
    );
    // NEW!
    let normal_matrix = mat3x3<f32>(
        instance.normal_matrix_0,
        instance.normal_matrix_1,
        instance.normal_matrix_2,
    );
    var out: VertexOutput;
    out.tex_coords = model.tex_coords;
    out.world_normal = normal_matrix * model.normal; // UPDATED!
    var world_position: vec4<f32> = model_matrix * vec4<f32>(model.position, 1.0);
    out.world_position = world_position.xyz;
    out.clip_position = camera.view_proj * world_position;
    return out;
}
I'm currently doing things in world space. Doing things in view-space also known as eye-space, is more standard as objects can have lighting issues when they are further away from the origin. If we wanted to use view-space, we would have included the rotation due to the view matrix as well. We'd also have to transform our light's position using something like view_matrix * model_matrix * light_position to keep the calculation from getting messed up when the camera moves.
There are advantages to using view space. The main one is when you have massive worlds doing lighting and other calculations in model spacing can cause issues as floating-point precision degrades when numbers get really large. View space keeps the camera at the origin meaning all calculations will be using smaller numbers. The actual lighting math ends up the same, but it does require a bit more setup.
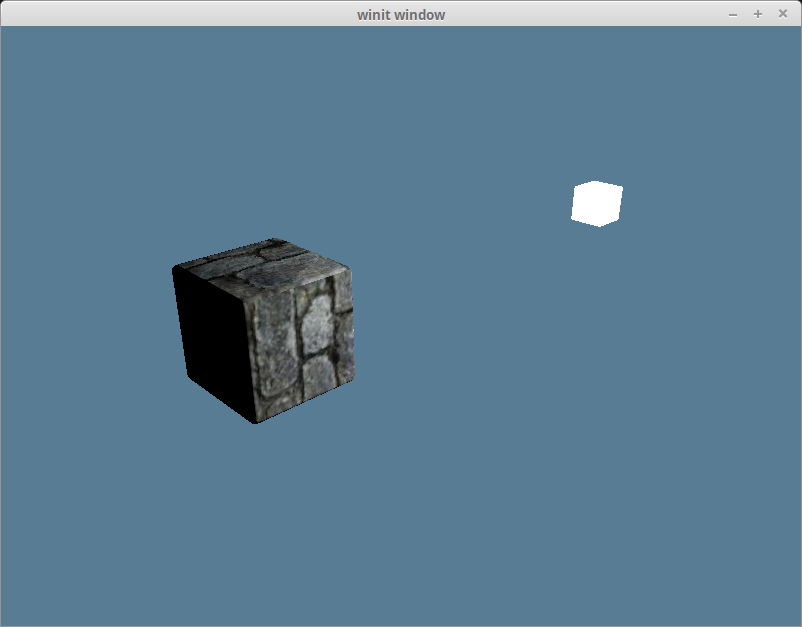
With that change, our lighting now looks correct.
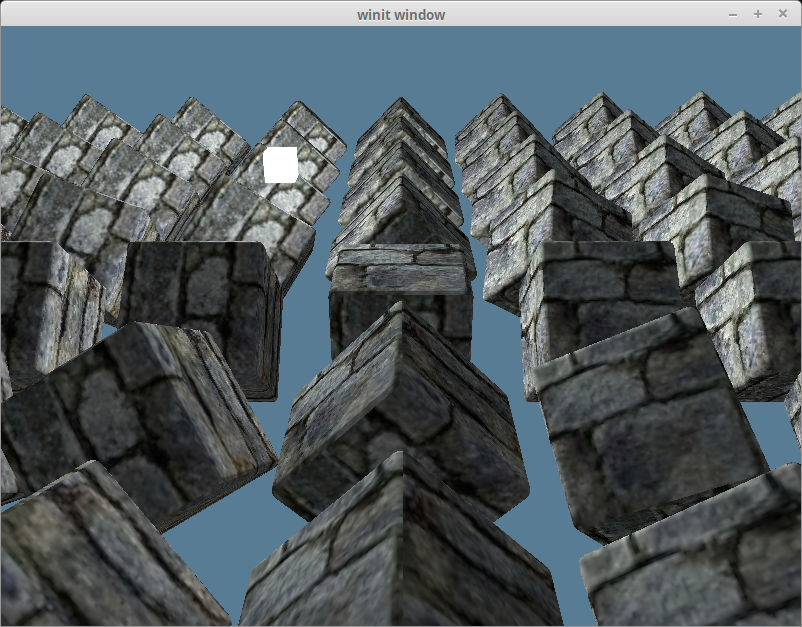
Bringing back our other objects, and adding the ambient lighting gives us this.
If you can guarantee that your model matrix will always apply uniform scaling to your objects, you can get away with just using the model matrix. Github user @julhe pointed shared this code with me that does the trick:
out.world_normal = (model_matrix * vec4<f32>(model.normal, 0.0)).xyz;
This works by exploiting the fact that by multiplying a 4x4 matrix by a vector with 0 in the w component, only the rotation and scaling will be applied to the vector. You'll need to normalize this vector though as normals need to be unit length for the calculations to work.
The scaling factor needs to be uniform in order for this to work. If it's not the resulting normal will be skewed as you can see in the following image.
Specular Lighting
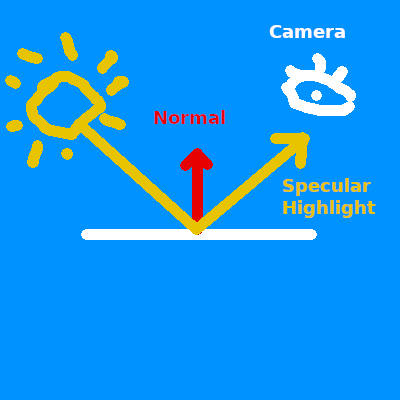
Specular lighting describes the highlights that appear on objects when viewed from certain angles. If you've ever looked at a car, it's the super bright parts. Basically, some of the light can reflect off the surface like a mirror. The location of the highlight shifts depending on what angle you view it at.
Because this is relative to the view angle, we are going to need to pass in the camera's position both into the fragment shader and into the vertex shader.
struct Camera {
    view_pos: vec4<f32>,
    view_proj: mat4x4<f32>,
}
@group(1) @binding(0)
var<uniform> camera: Camera;
Don't forget to update the Camera struct in light.wgsl as well, as if it doesn't match the CameraUniform struct in rust, the light will render wrong.
We're going to need to update the CameraUniform struct as well.
// lib.rs
#[repr(C)]
#[derive(Copy, Clone, bytemuck::Pod, bytemuck::Zeroable)]
struct CameraUniform {
    view_position: [f32; 4],
    view_proj: [[f32; 4]; 4],
}

impl CameraUniform {
    fn new() -> Self {
        Self {
            view_position: [0.0; 4],
            view_proj: cgmath::Matrix4::identity().into(),
        }
    }

    fn update_view_proj(&mut self, camera: &Camera) {
        // We're using Vector4 because of the uniforms 16 byte spacing requirement
        self.view_position = camera.eye.to_homogeneous().into();
        self.view_proj = (OPENGL_TO_WGPU_MATRIX * camera.build_view_projection_matrix()).into();
    }
}
Since we want to use our uniforms in the fragment shader now, we need to change its visibility.
// lib.rs
let camera_bind_group_layout = device.create_bind_group_layout(&wgpu::BindGroupLayoutDescriptor {
    entries: &[
        wgpu::BindGroupLayoutBinding {
            // ...
            visibility: wgpu::ShaderStages::VERTEX | wgpu::ShaderStages::FRAGMENT, // Updated!
            // ...
        },
        // ...
    ],
    label: None,
});
We're going to get the direction from the fragment's position to the camera, and use that with the normal to calculate the reflect_dir.
// shader.wgsl
// In the fragment shader...
let view_dir = normalize(camera.view_pos.xyz - in.world_position);
let reflect_dir = reflect(-light_dir, in.world_normal);
Then we use the dot product to calculate the specular_strength and use that to compute the specular_color.
let specular_strength = pow(max(dot(view_dir, reflect_dir), 0.0), 32.0);
let specular_color = specular_strength * light.color;
Finally, we add that to the result.
let result = (ambient_color + diffuse_color + specular_color) * object_color.xyz;
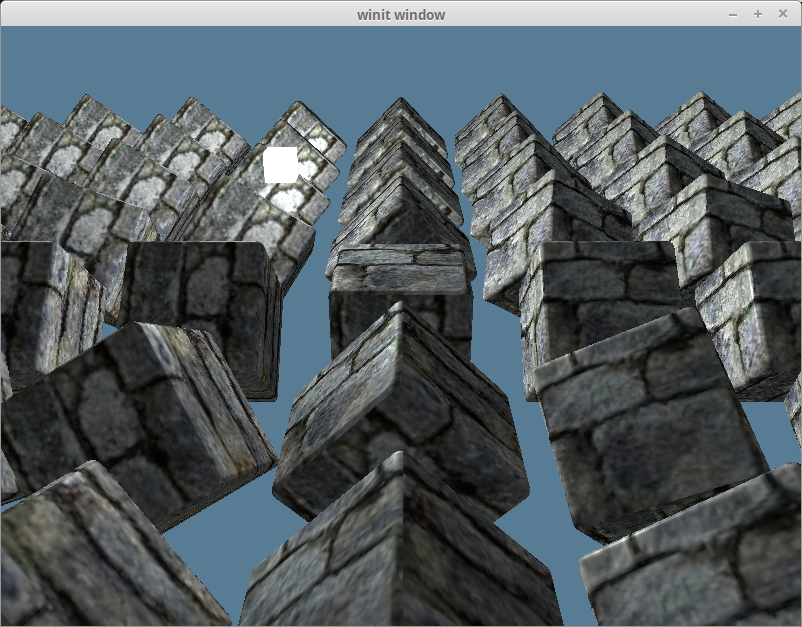
With that, you should have something like this.
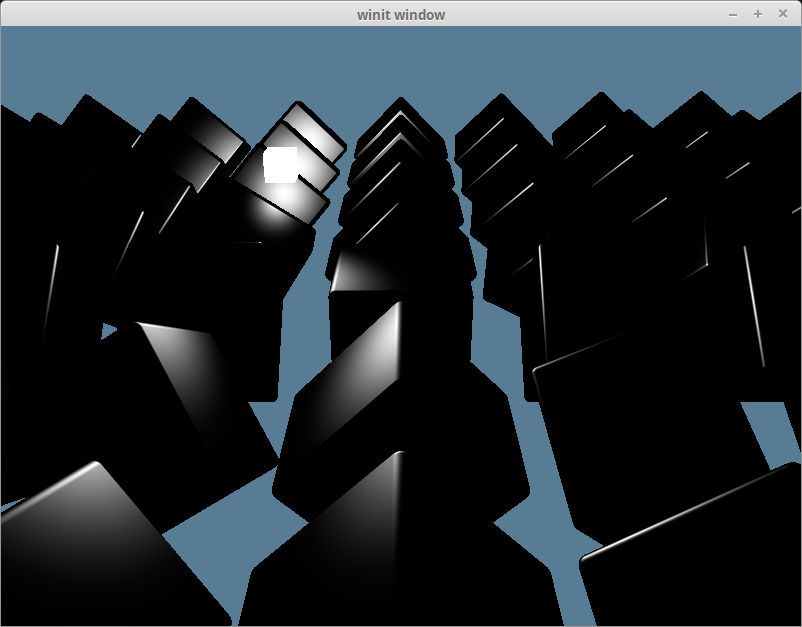
If we just look at the specular_color on its own we get this.
The half direction
Up to this point, we've actually only implemented the Phong part of Blinn-Phong. The Phong reflection model works well, but it can break down under certain circumstances. The Blinn part of Blinn-Phong comes from the realization that if you add the view_dir, and light_dir together, normalize the result and use the dot product of that and the normal, you get roughly the same results without the issues that using reflect_dir had.
let view_dir = normalize(camera.view_pos.xyz - in.world_position);
let half_dir = normalize(view_dir + light_dir);

let specular_strength = pow(max(dot(in.world_normal, half_dir), 0.0), 32.0);
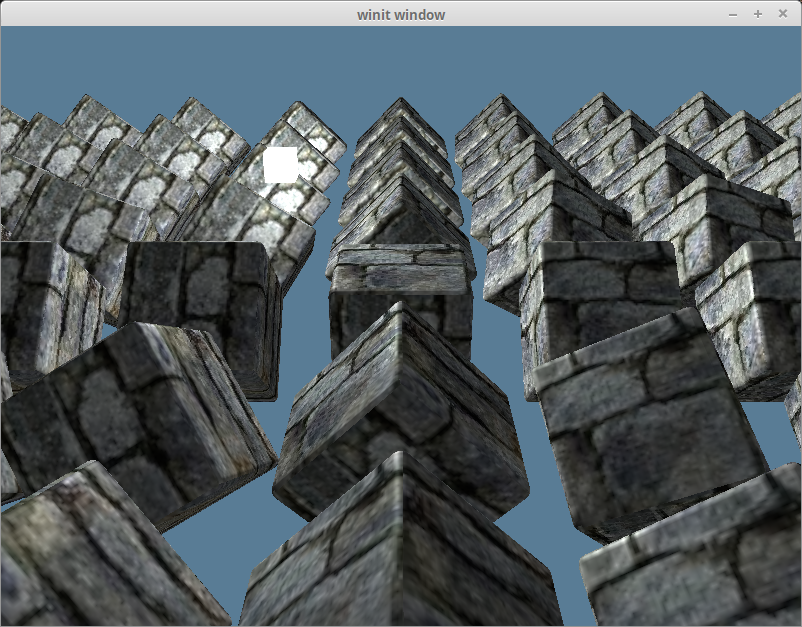
It's hard to tell the difference, but here are the results.
